my.SDSU Student Registration Guide
This step-by-step registration guide provides you with the information you need to plan your schedule, register for classes, and pay your tuition and fees.
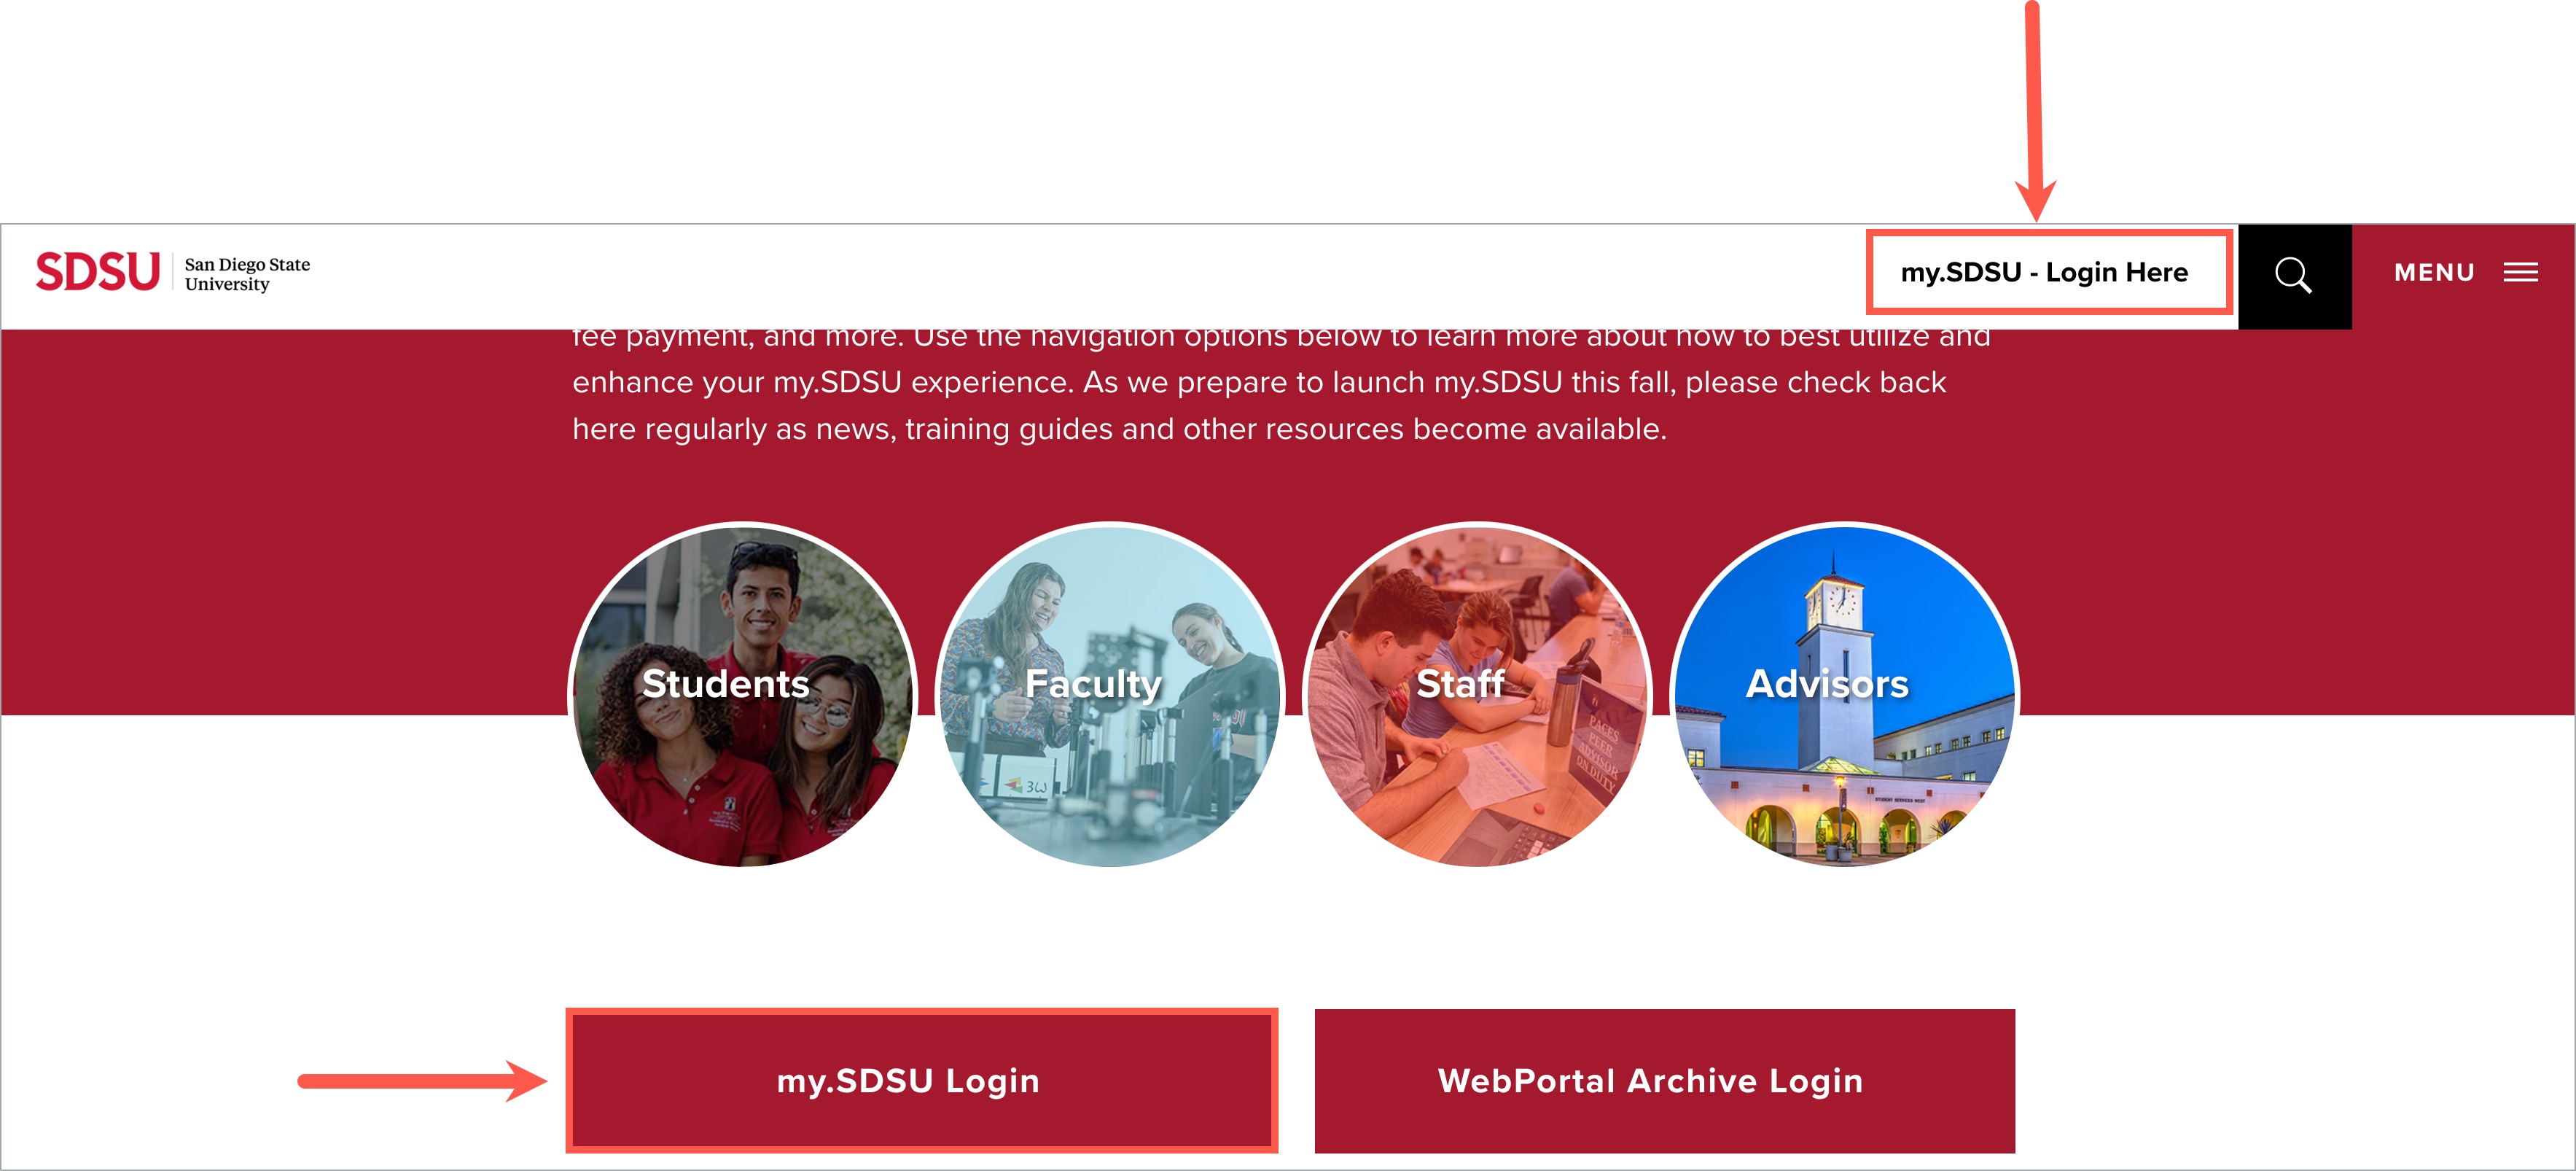
Visit my.SDSU and select my.SDSU Log In. Enter your SDSUid and password, and select Sign In. For additional guidance on how to log in, please read How Do I Log In To my.SDSU Portal?
Note: There are two ways to log in (at the upper-right hand of the page or mid-page).
Every term, all SDSU students, including undergraduate, Global Campus, and graduate students, will receive a registration window to sign up for their upcoming semester's courses. In order to view your registration window, please follow these instructions:
1. Select the Manage Classes tile from the my.SDSU home page.
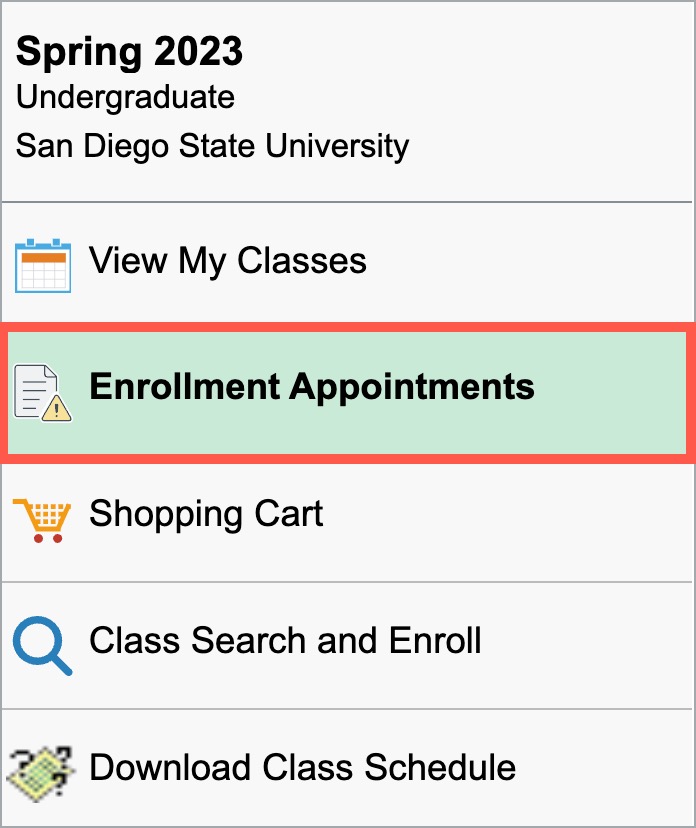
2. Choose Enrollment Appointments from the left-hand sidebar.
3. Choose the term for which you wish to register. Please pay attention to the start and end dates for the registration window. Registration windows for San Diego and Imperial Valley will appear under the Regular Academic Session.
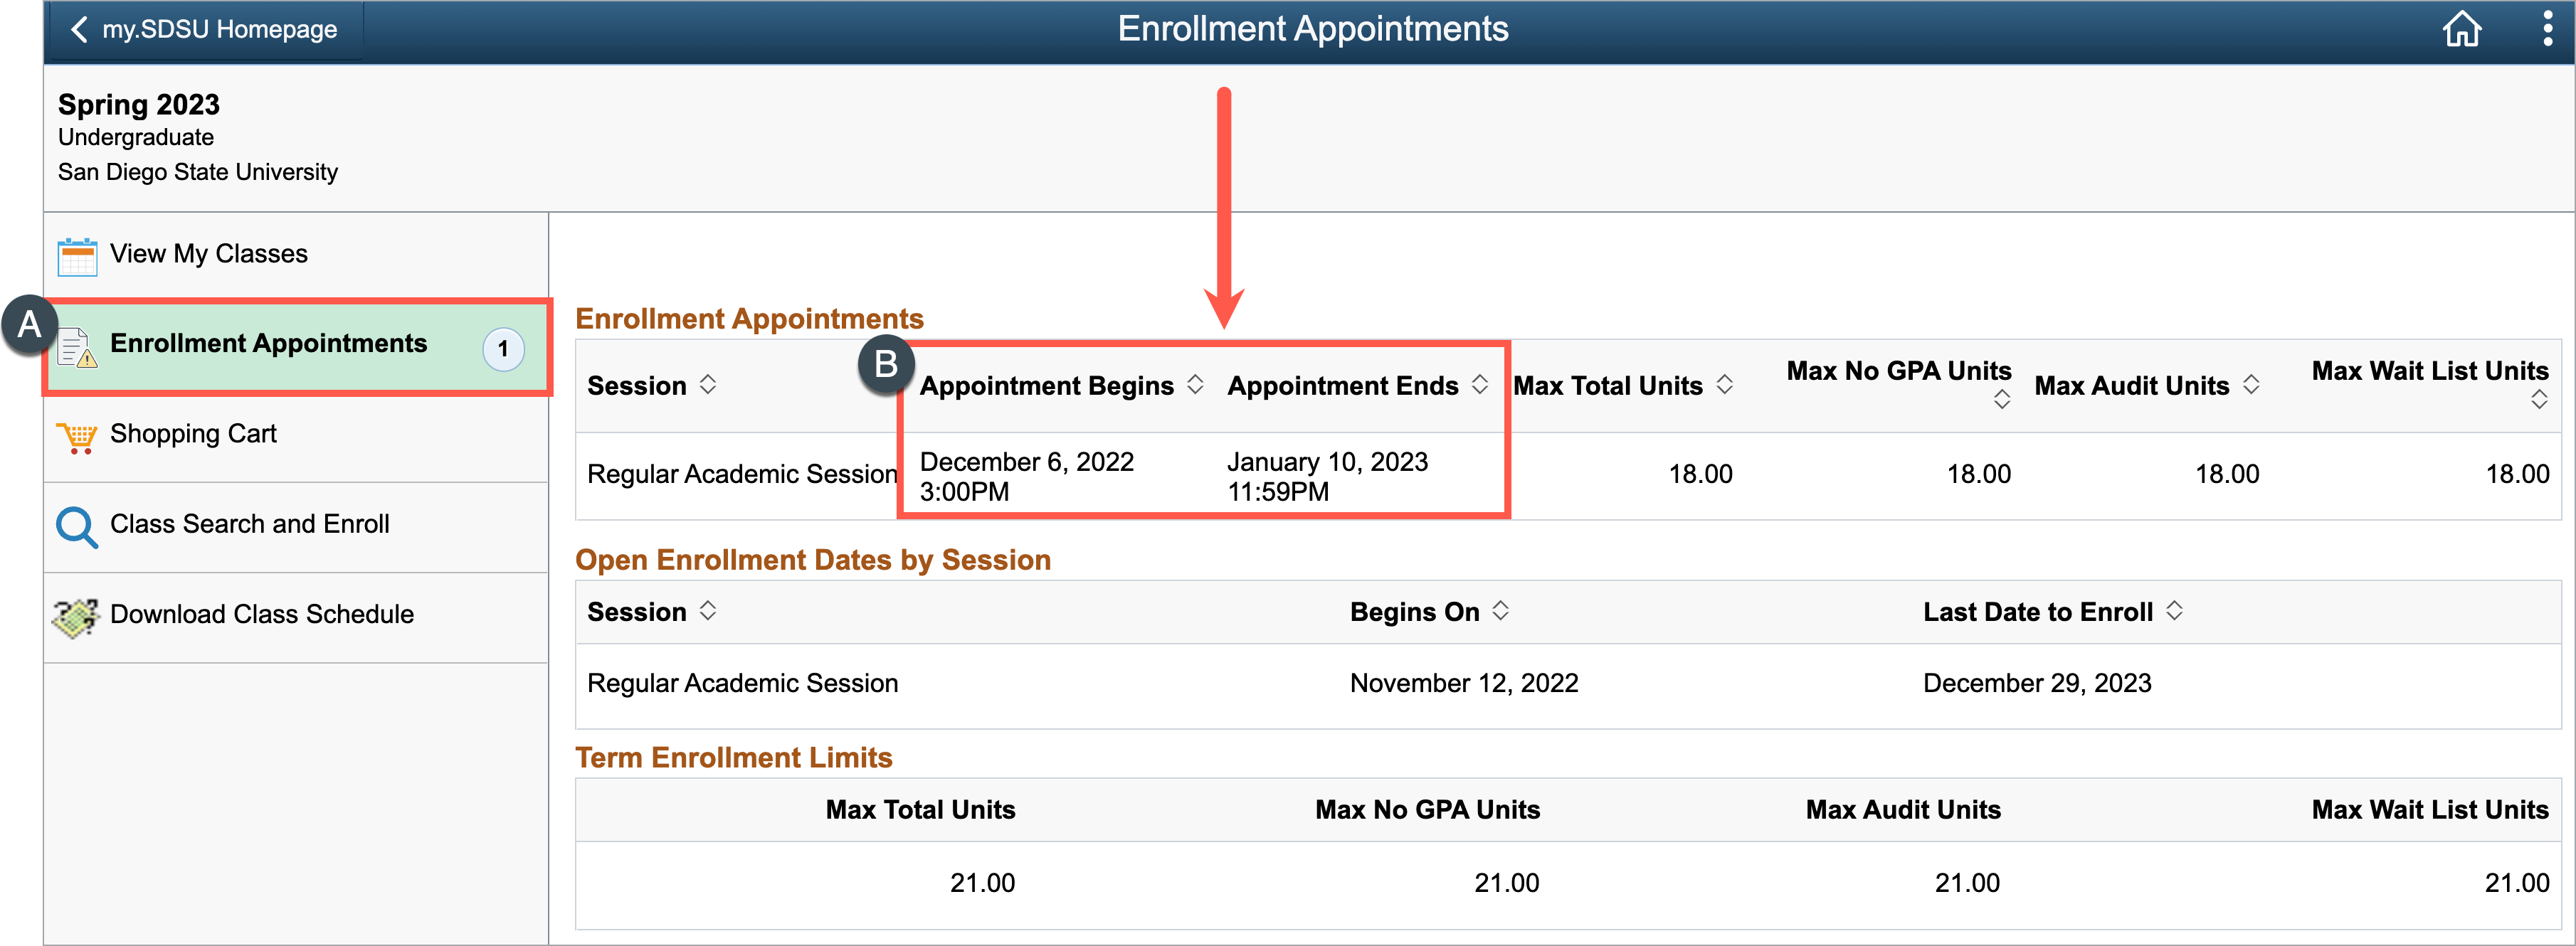
Global Campus registration windows appear under Special Sessions.

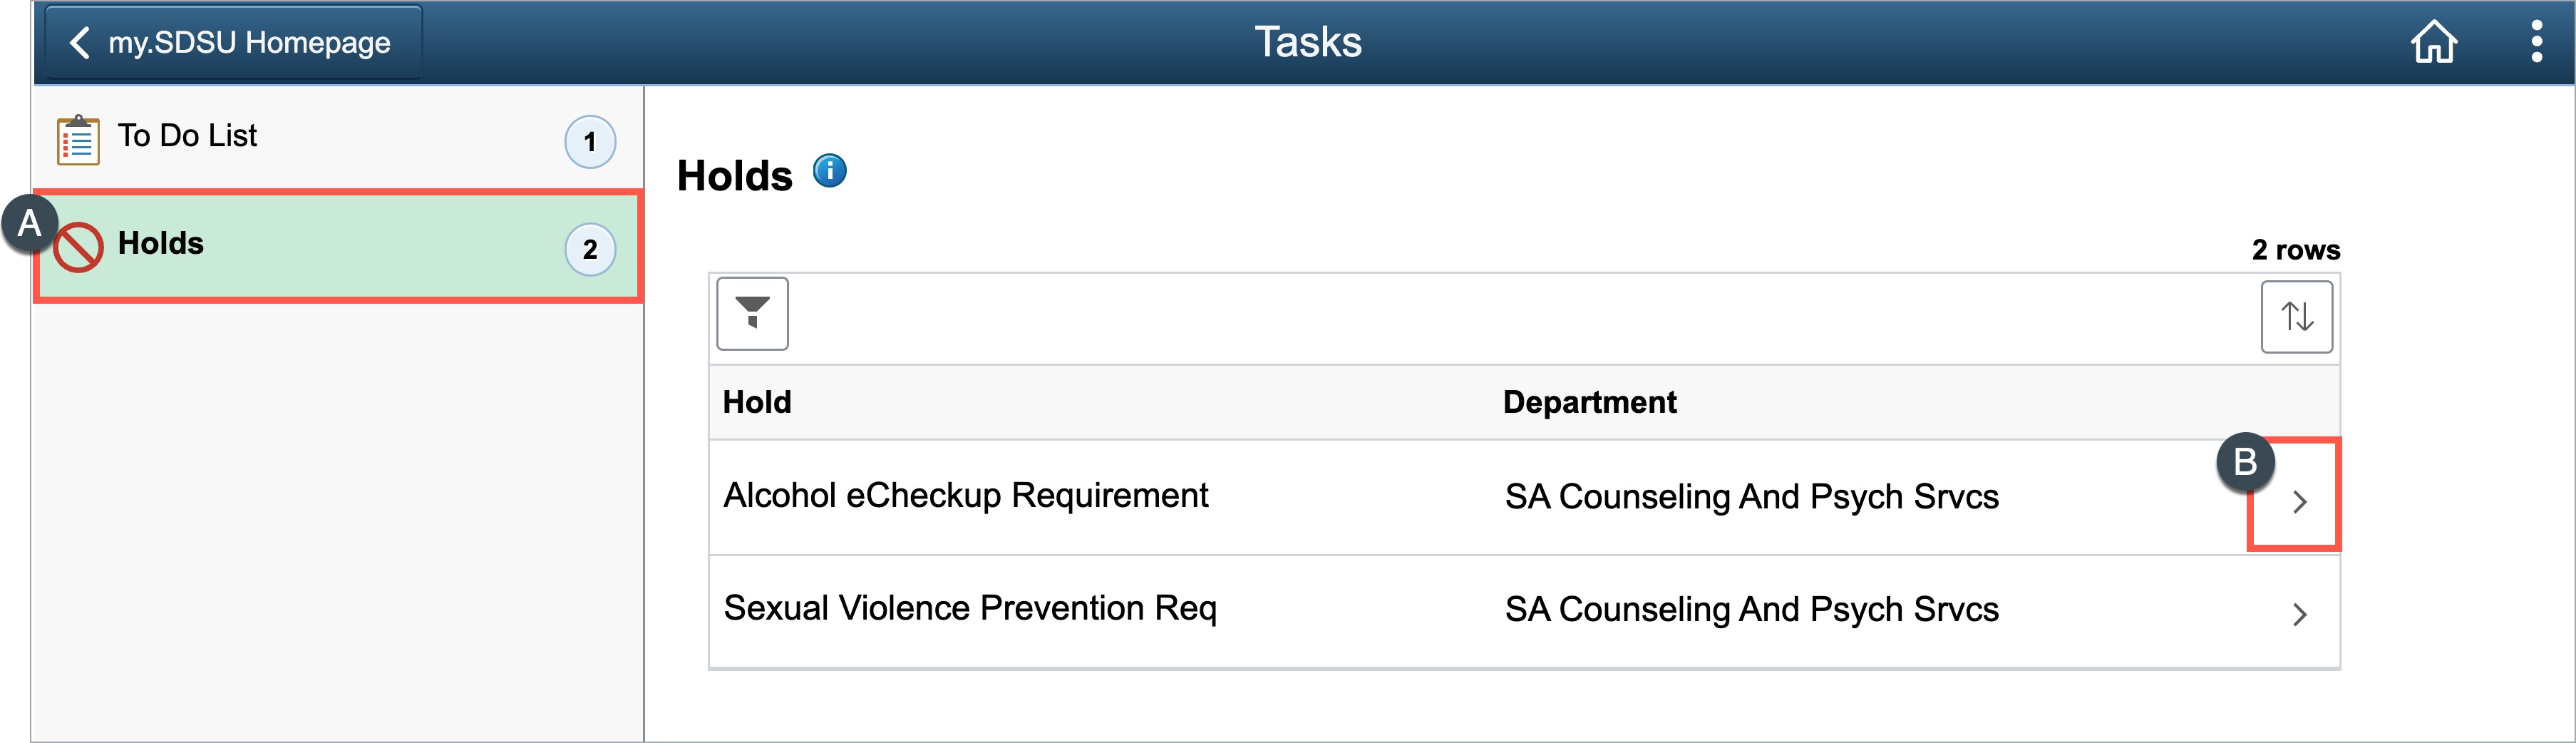
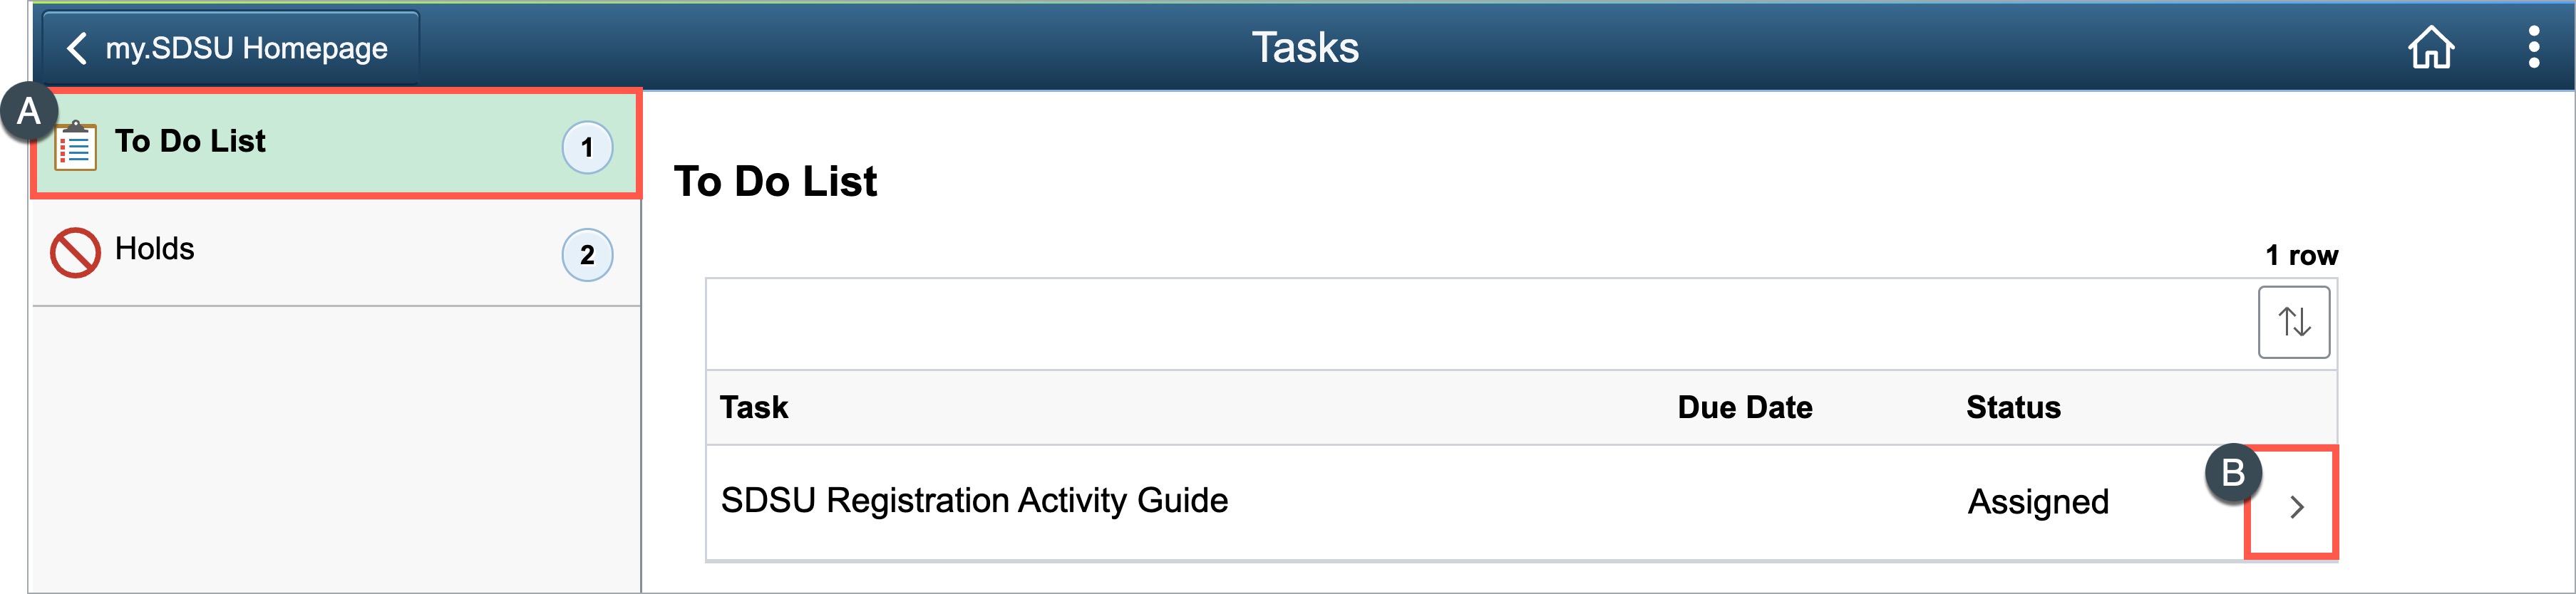
Check to see if there are any holds or tasks that need to be resolved by viewing your tasks.
1. Select the Tasks tile from the my.SDSU home page.
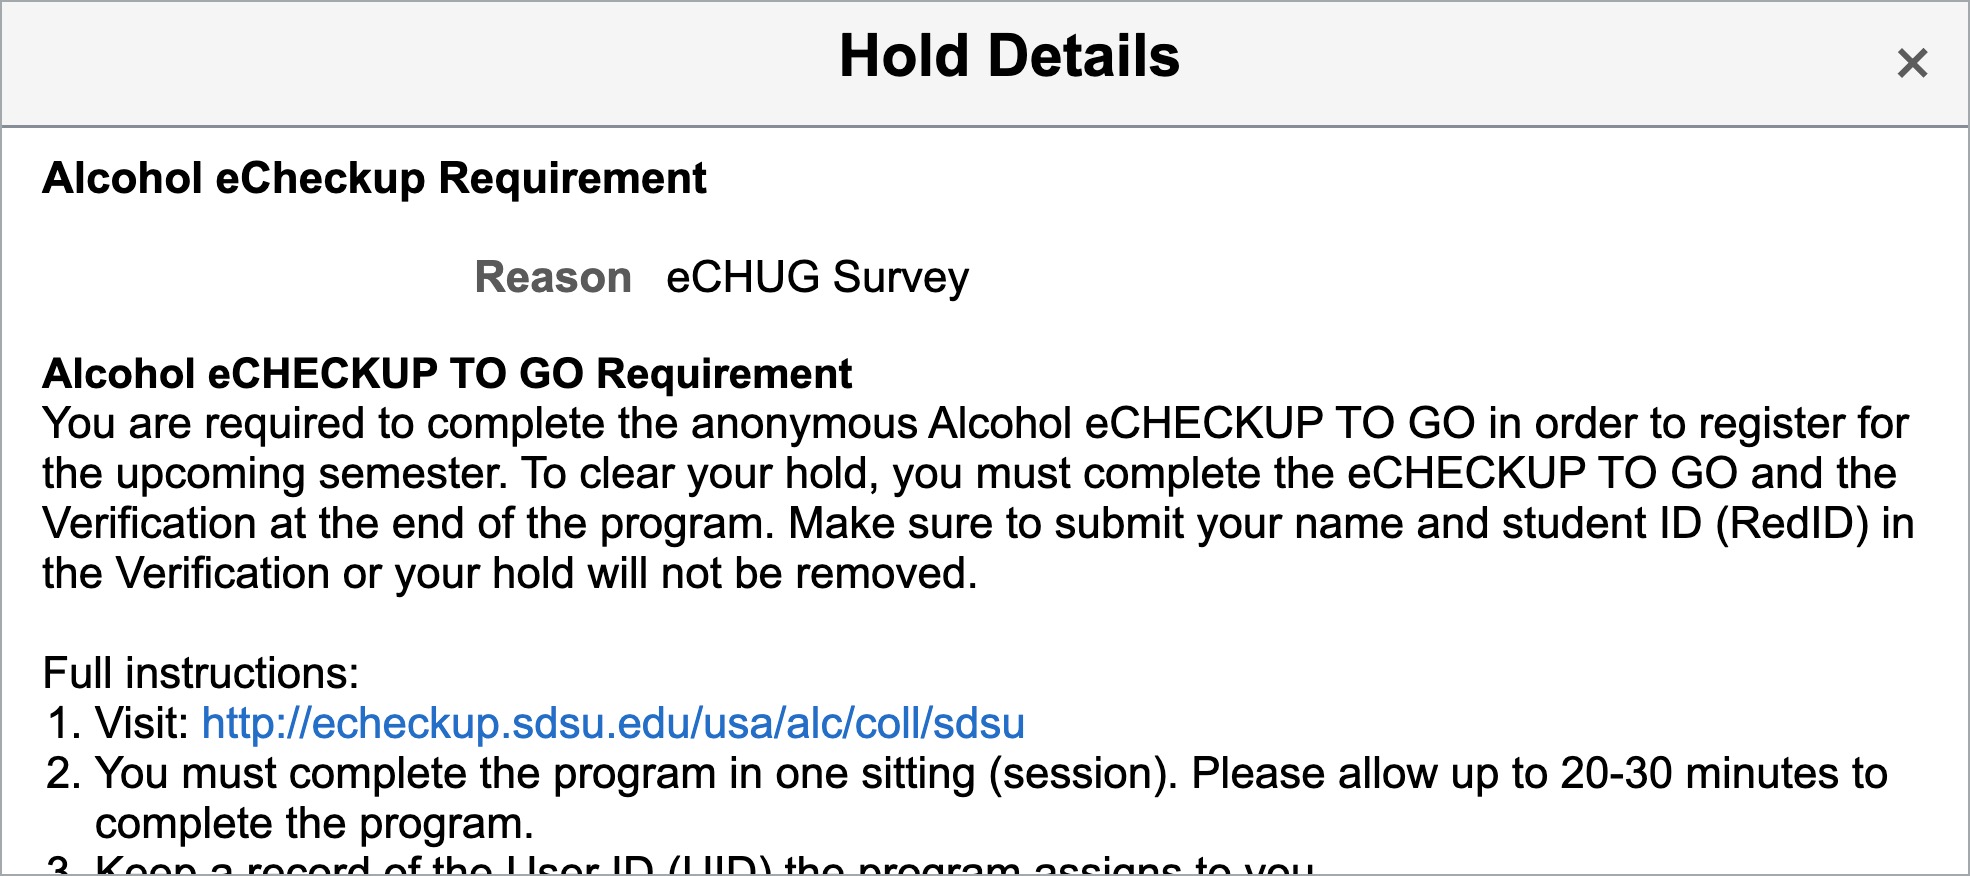
2. Select Holds from the menu on the left-hand side. Select the side arrow for hold and contact information. Remember some holds may take 3-5 days to clear, so please plan accordingly.
3. Select To Do List from the menu on the left-hand side. Select the side arrow to begin the task.
Note: Review any holds for GE oral communication, GE critical thinking, math placement, and written/comm placement to determine which foundational General Education courses you need in your first year. Refer to your Degree Evaluation and My.MAP to determine the course(s) needed each semester.
Once you log in, use the Manage Classes tile to search and add courses to your shopping cart ahead of time. Populating your Shopping Cart now will help you save time when your registration window opens. When your registration window opens, you can quickly register for courses from your Shopping Cart.
Note: Remember to review course details carefully to ensure you meet all course prerequisites or are on track to complete the requisites by the end of the current semester.
1. Select the Manage Classes tile from the my.SDSU home page.
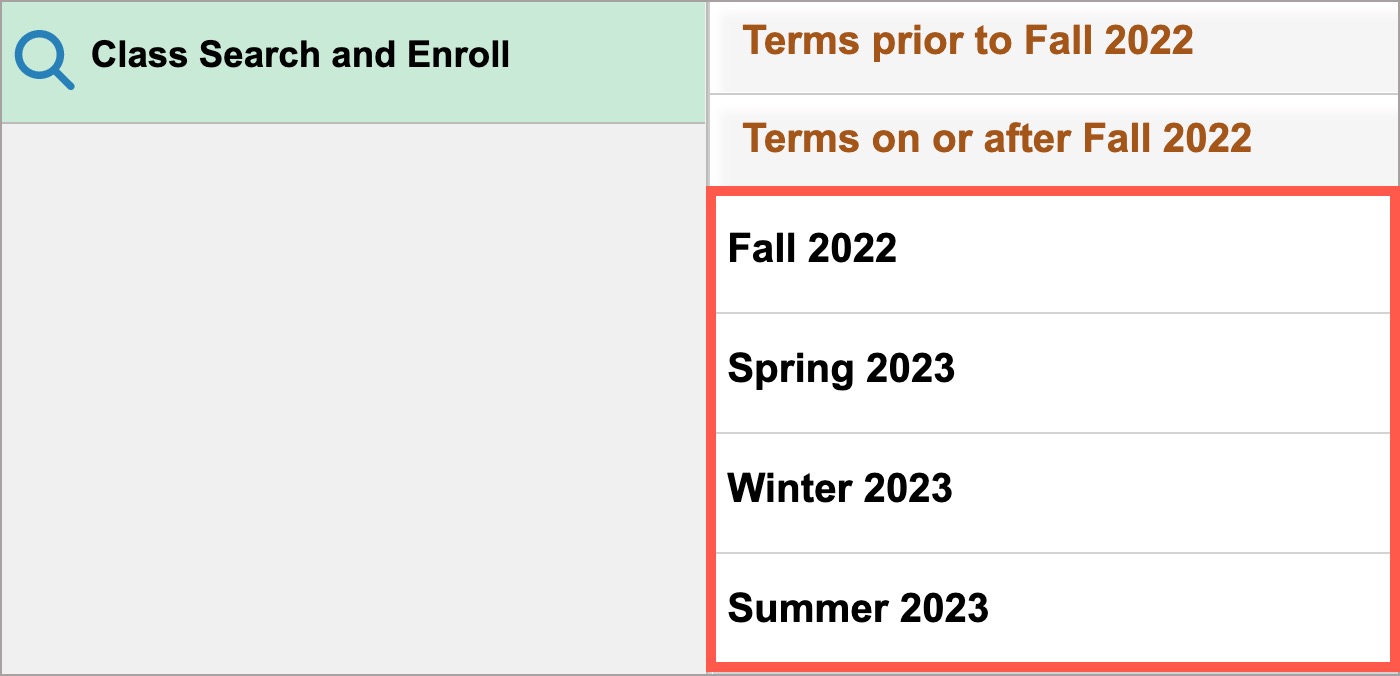
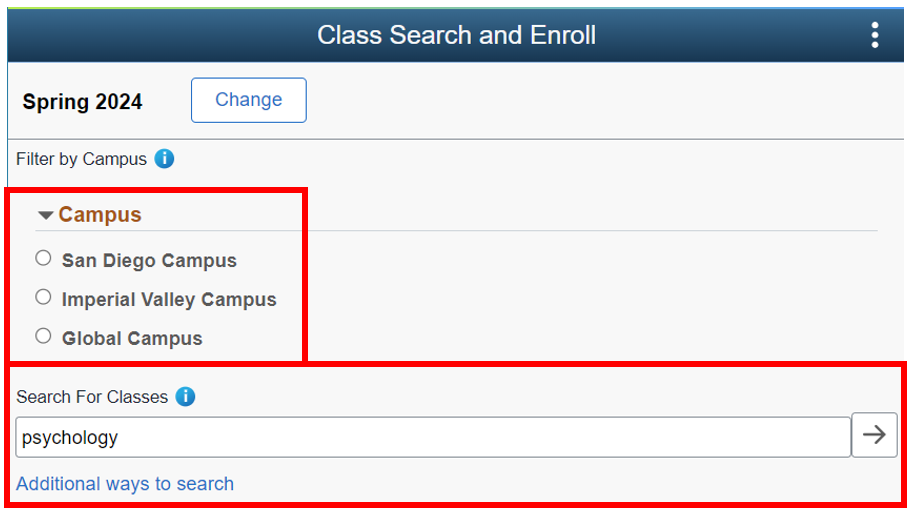
2. Then select the Class Search and Enroll tab on the left hand menu. Select the term you wish to search for classes in.
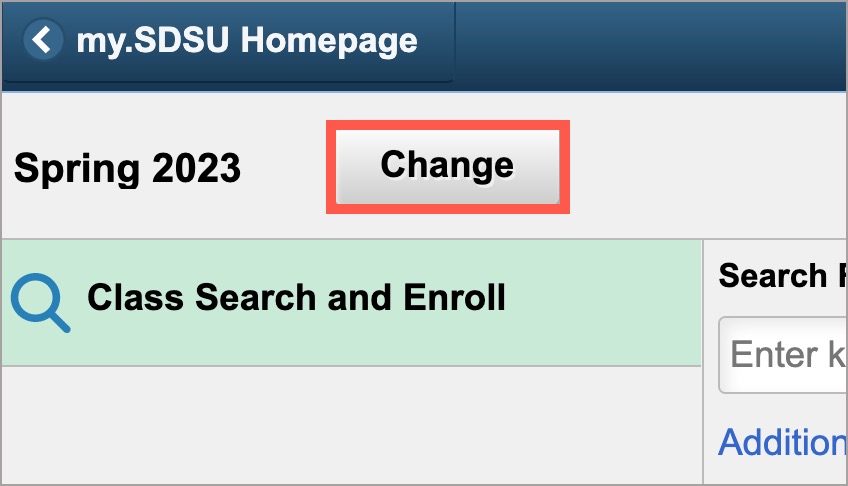
You can change the semester or term at any time by selecting the Change button in the top left corner.
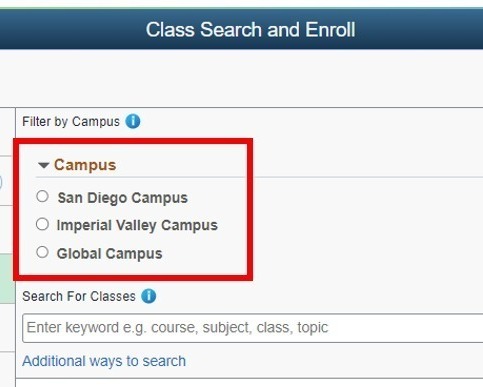
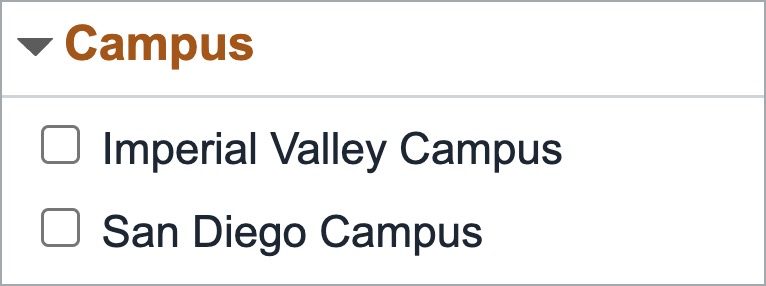
3. Select the Campus that you will be attending.
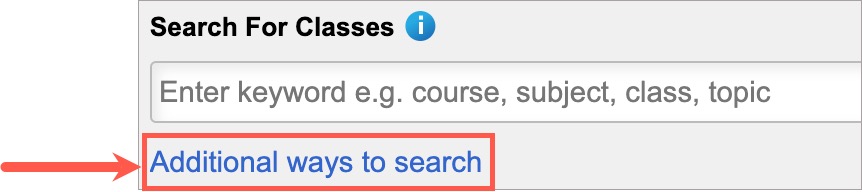
Search for Classes
In the middle of the screen, you will see a Search for Classes field. This field can be used to search the schedule more broadly and searches by key words.
For example, if you type in “history” any course that has the word “history” will show up in your search results.
There is also a link for Additional ways to search. The Additional ways to search feature will help you navigate more efficiently to what you are looking for.
We recommend using the Additional ways to search feature when planning your class schedule.
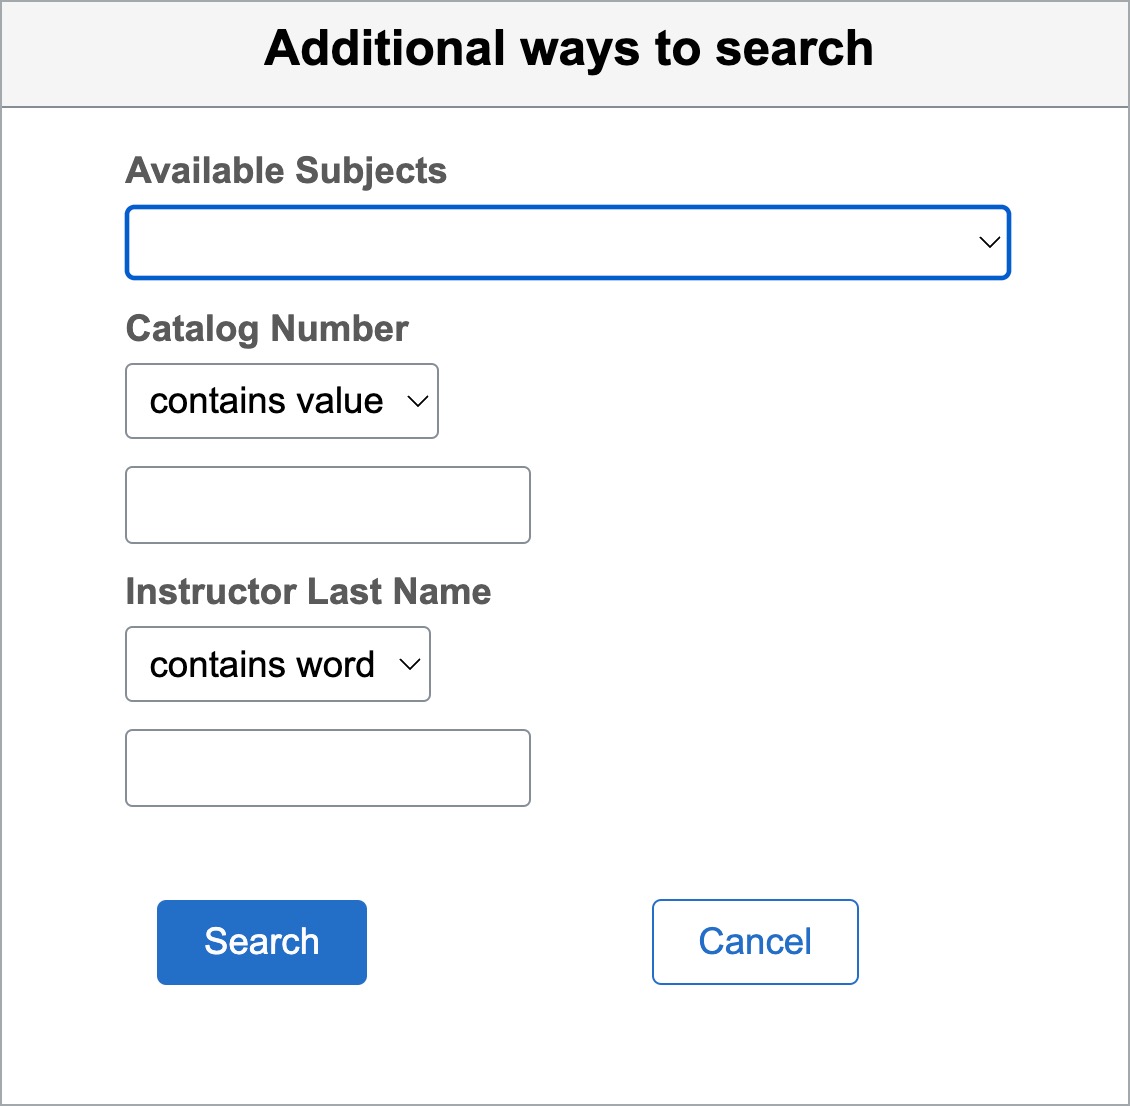
If you do not know the specific Course ID for the class you want to take, please use the Additional ways to search function. This screen contains the following fields to help you narrow down your search:
- Available Subjects: This field refers to the subject area in which the course is located (e.g. History). You must enter the subject in order for the search to be performed.
- Catalog Number: This field is not required, however if you know the specific course number (e.g. HIST 101) you will want to add the number into this field for a more efficient search.
- Instructor Last Name: This field refers to the last name of the instructor (if known). You can also specify if your search term contains or is exactly a specific name (e.g. contains word “de la” vs. = “de la Torre” if you are searching for Professor de la Torre).
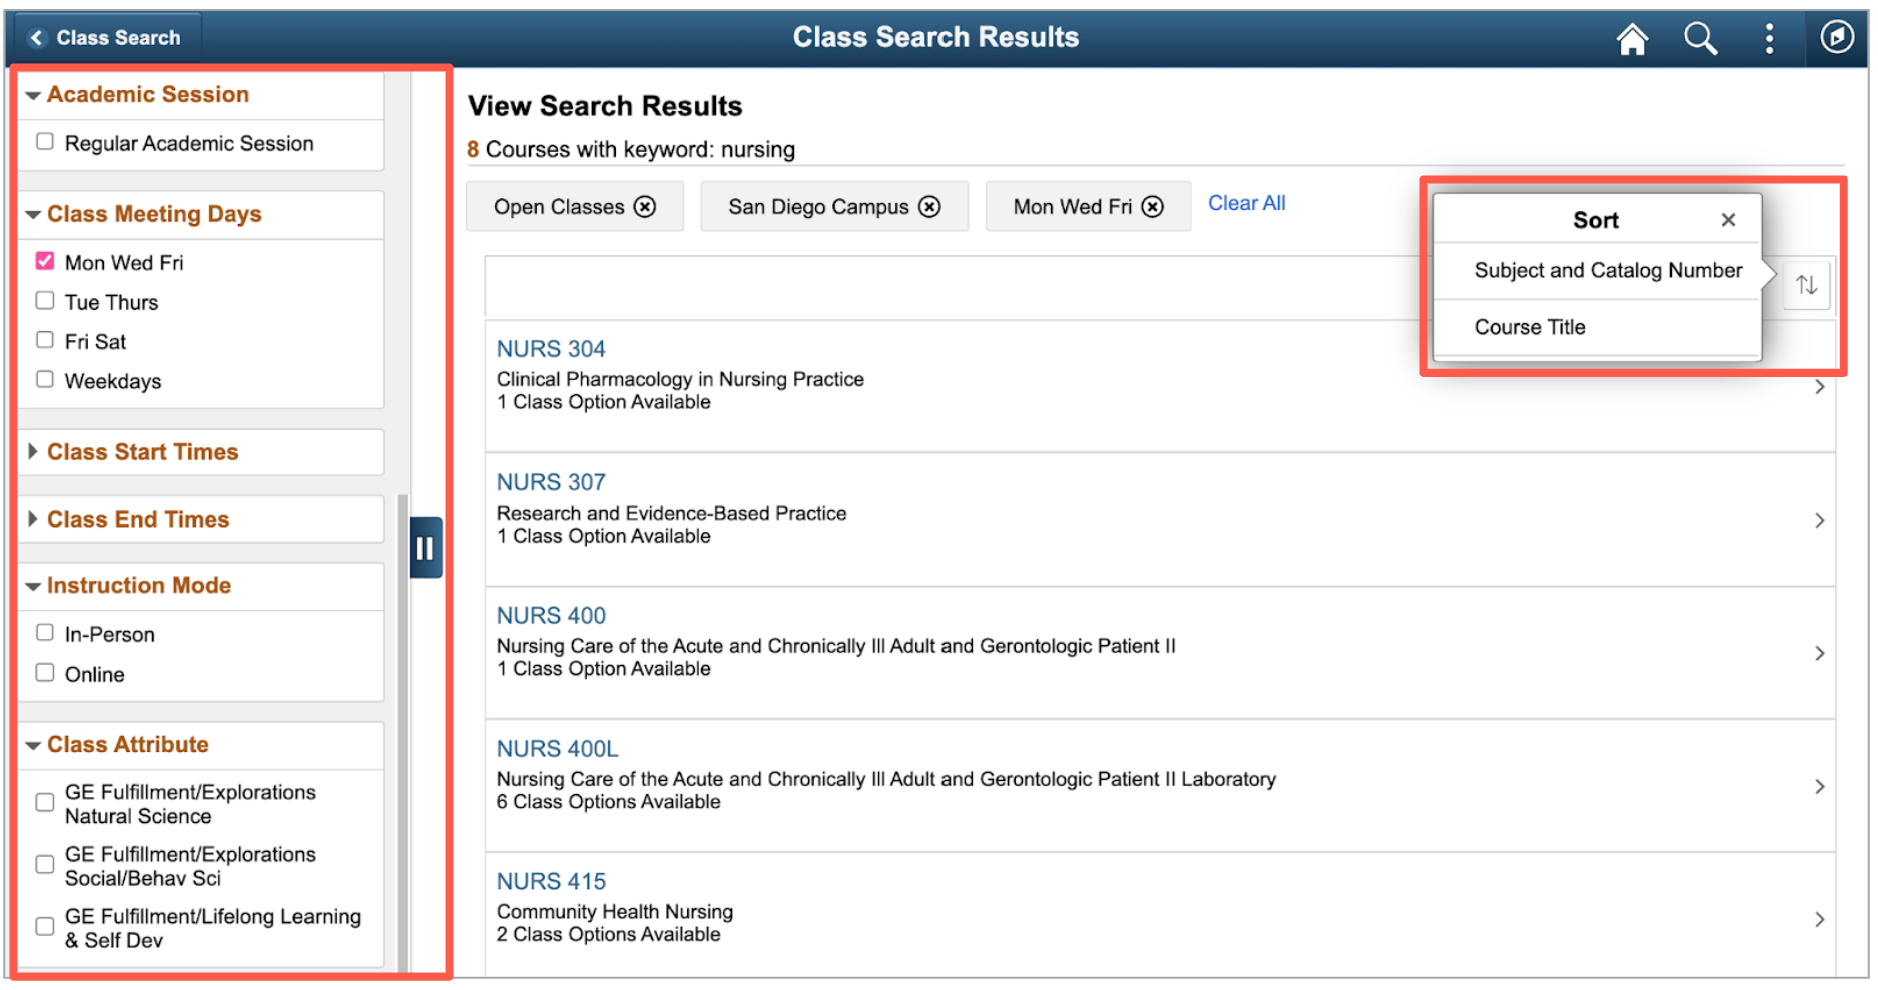
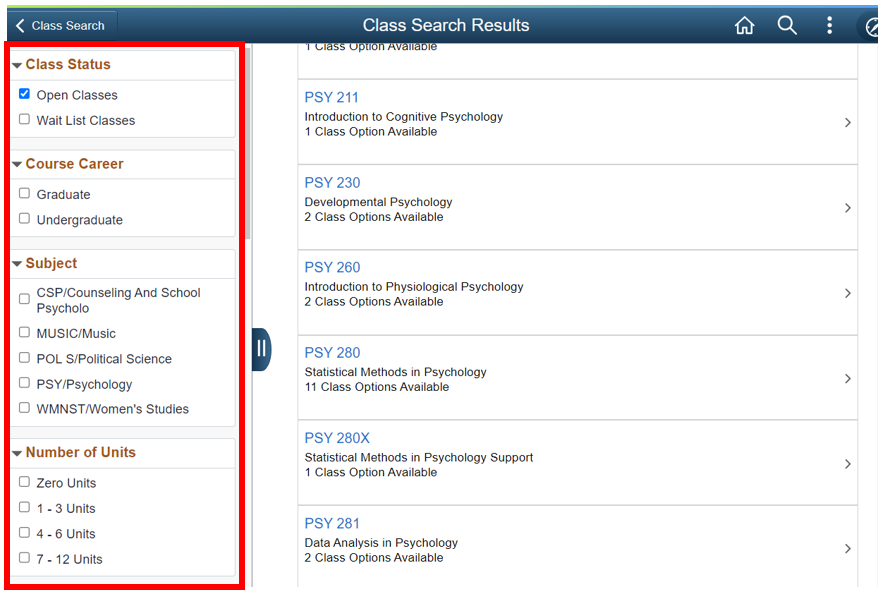
Using Filters to Narrow Down Your Search
Once you have your search results, you can narrow down your search by using the filters on the left hand side of your screen.
Your first filter was alraedy applied at the beginning of your class search (step 3 above) when you selected your campus.
The class schedule has the ability to display courses at all SDSU campus locations (San Diego, Imperial Valley, and Global Campus); however, you may only enroll at your home campus. Students must receive special permission to enroll at a different campus.
Additional Filters
Other ways to filter your search results are by Units, Class Meeting Days and Times, Instruction Mode, and Class Attributes.
Use the Class Attribute filter to search for courses that satisfy a General Education (GE) requirement.
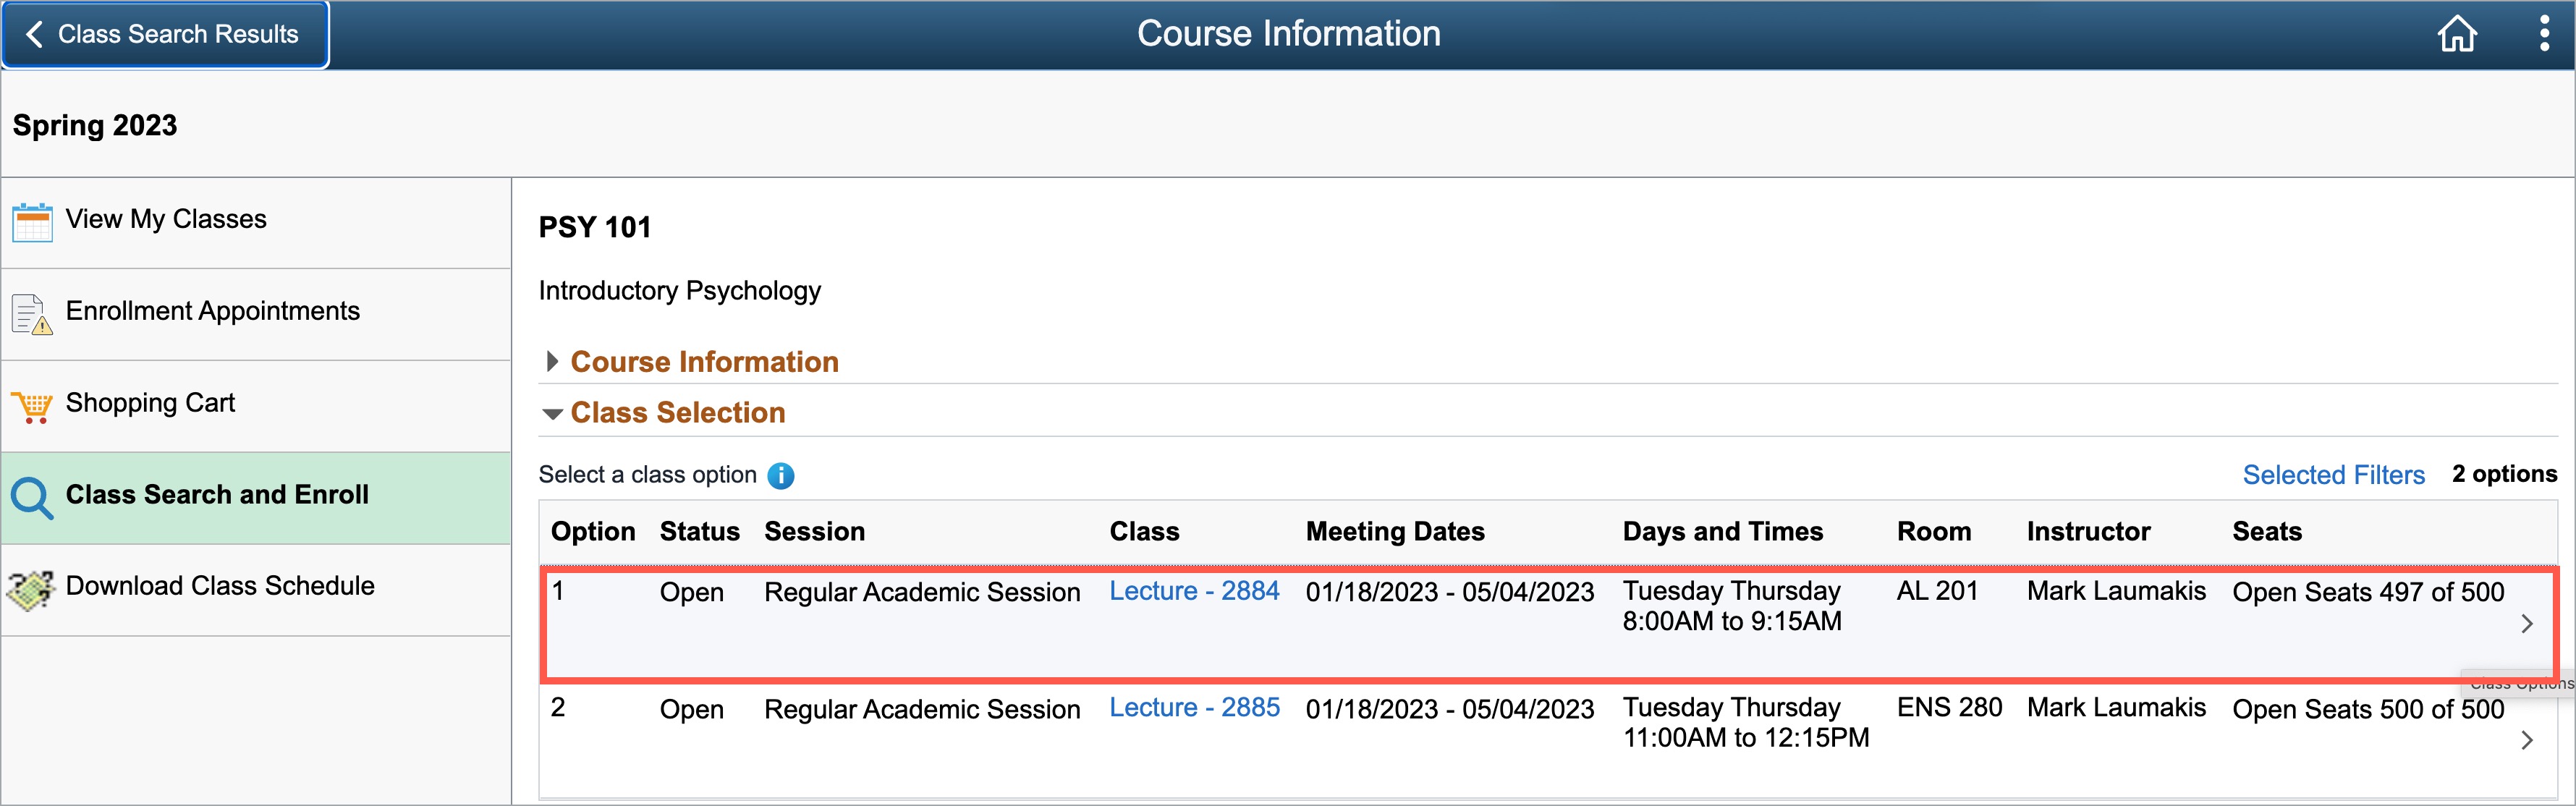
View Class Information and Details
Once you have your search results, you will need to review the class information and details by selecting the course.
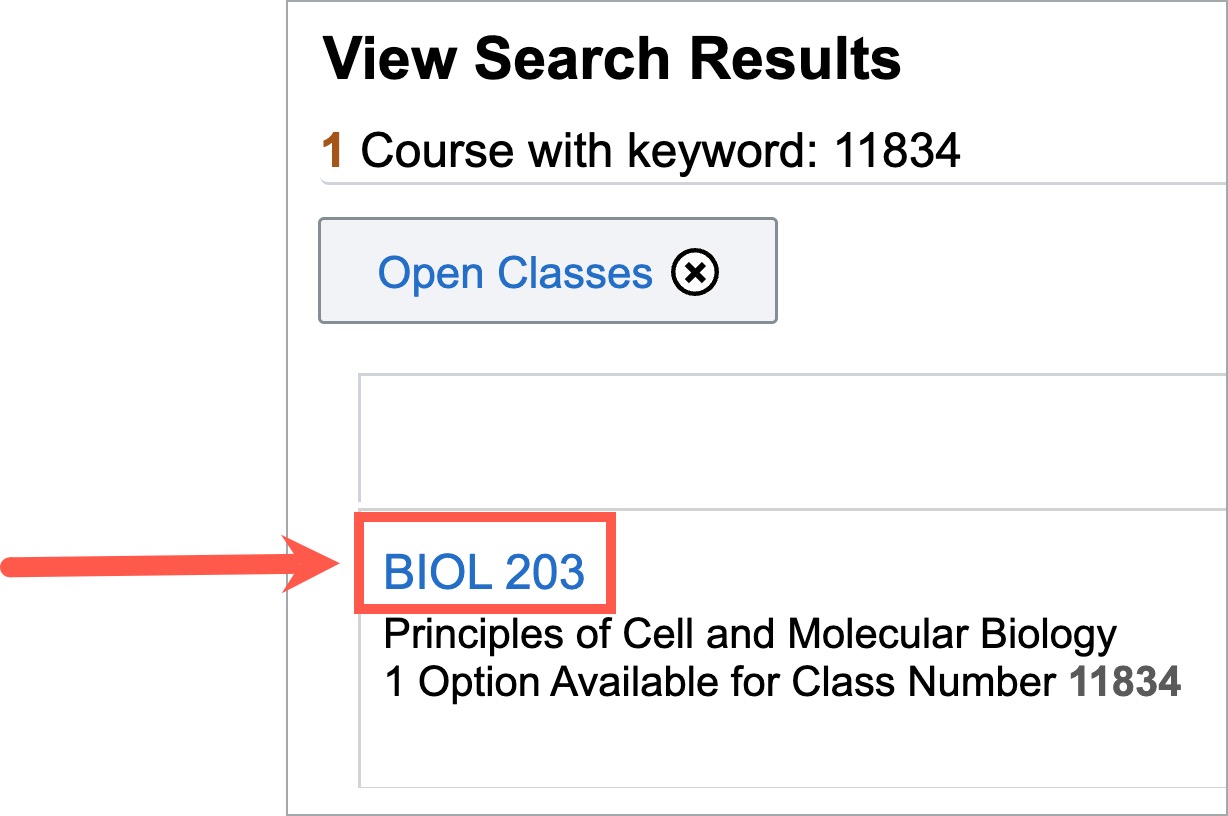
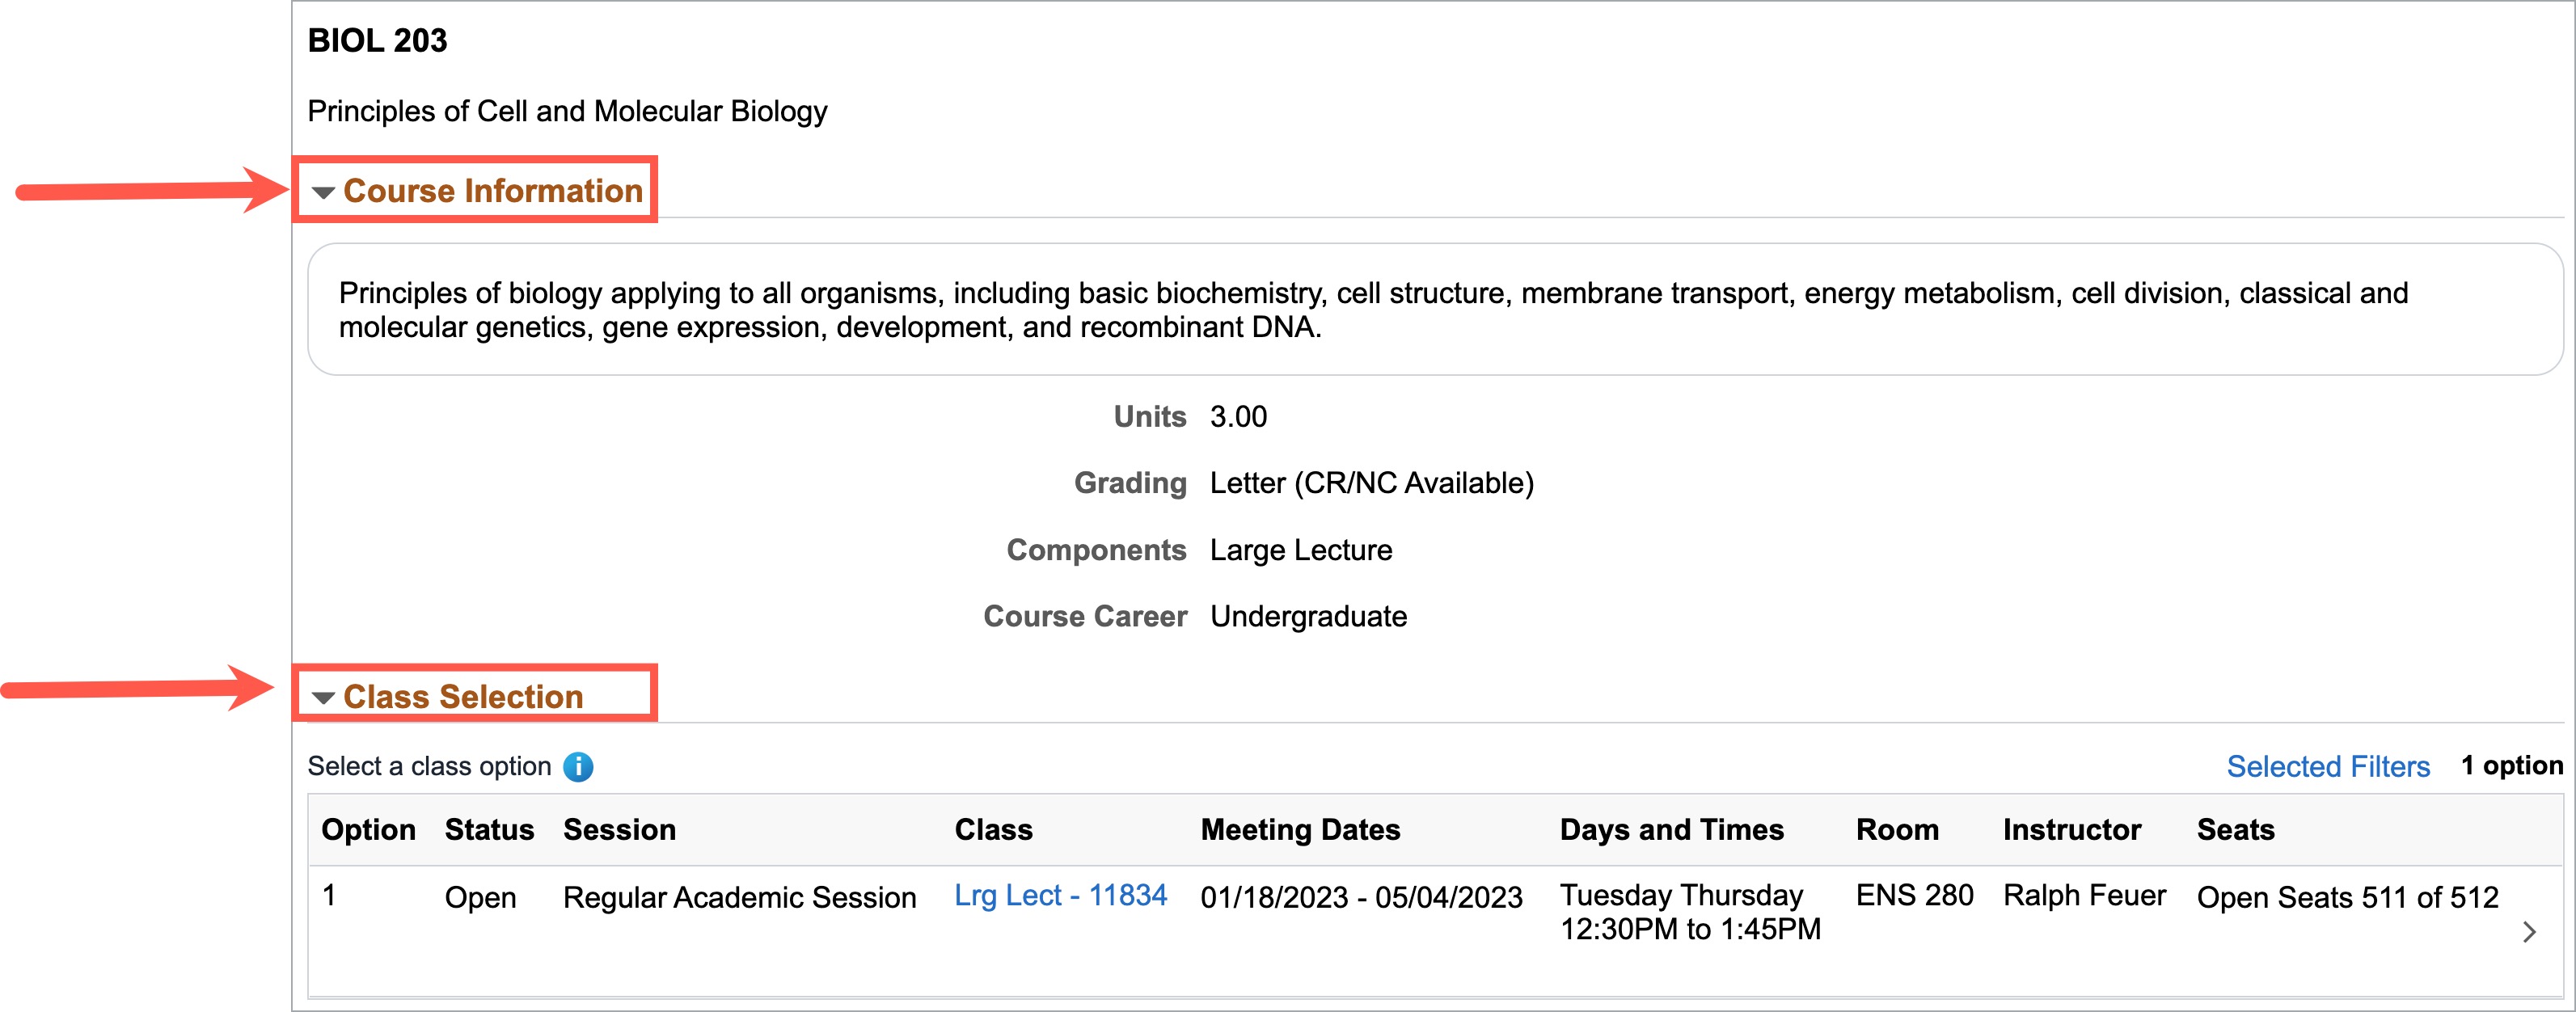
You can review Course Information by selecting the course. This section will provide the course description, units, and additional information about the class.
Under Class Selection you will be able to view the section offerings. The Class Selection section will provide more detail about each section such as meeting dates/times, the scheduled room, instructor assigned, and available seats.
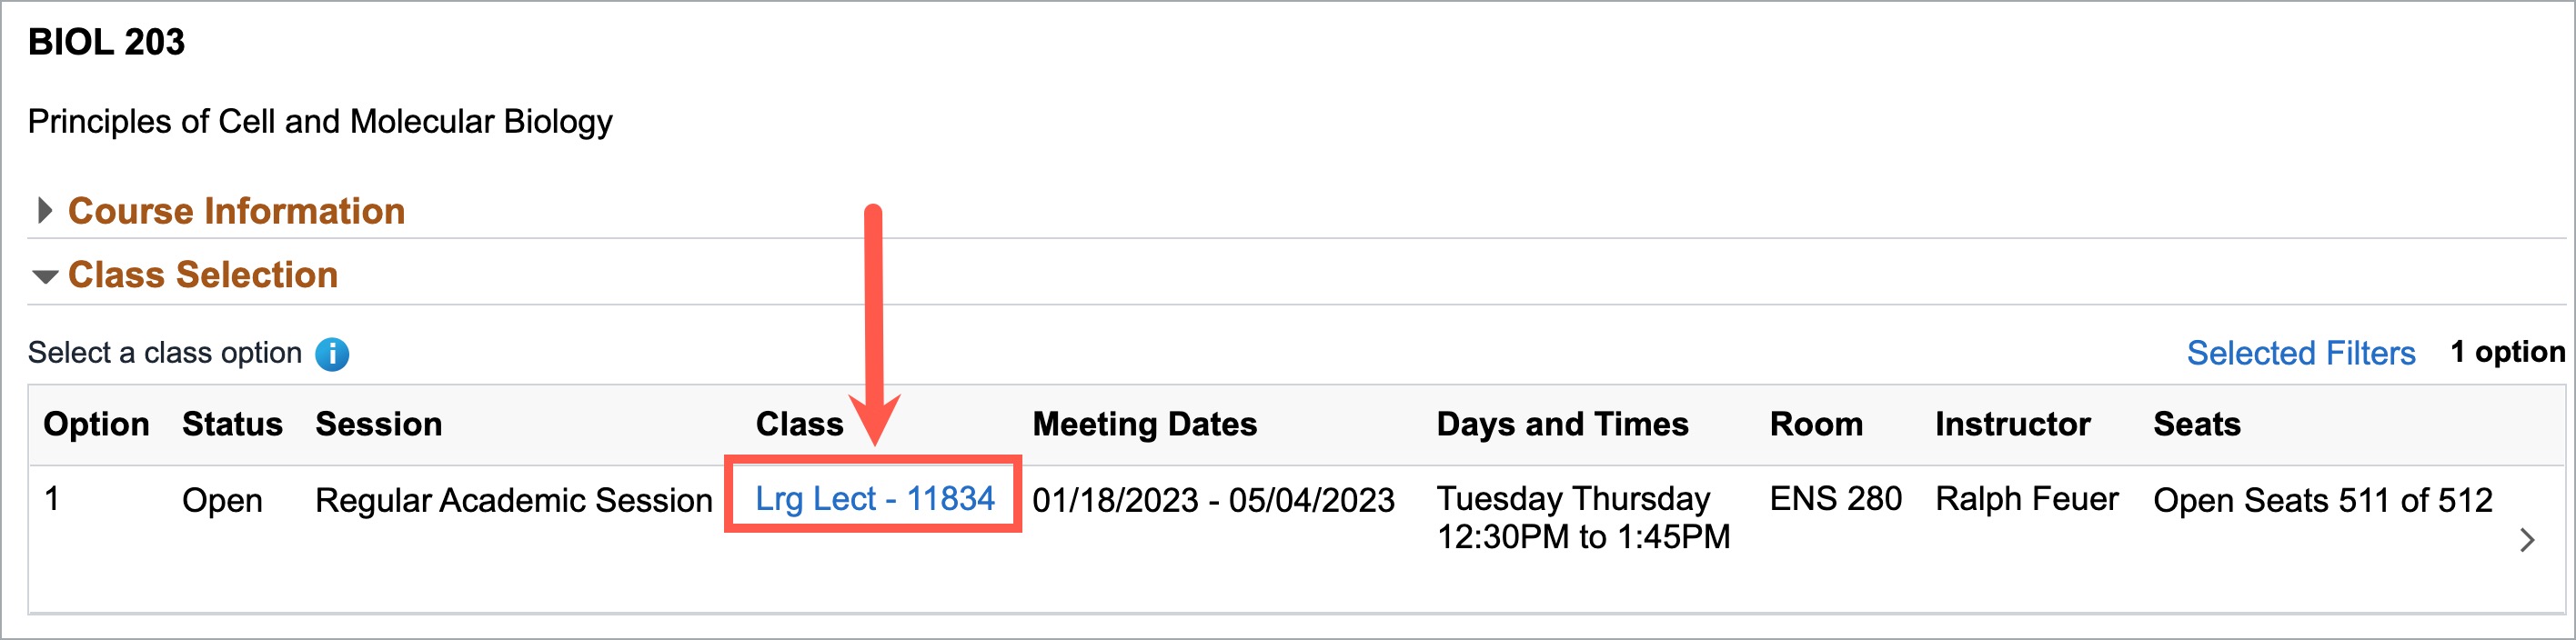
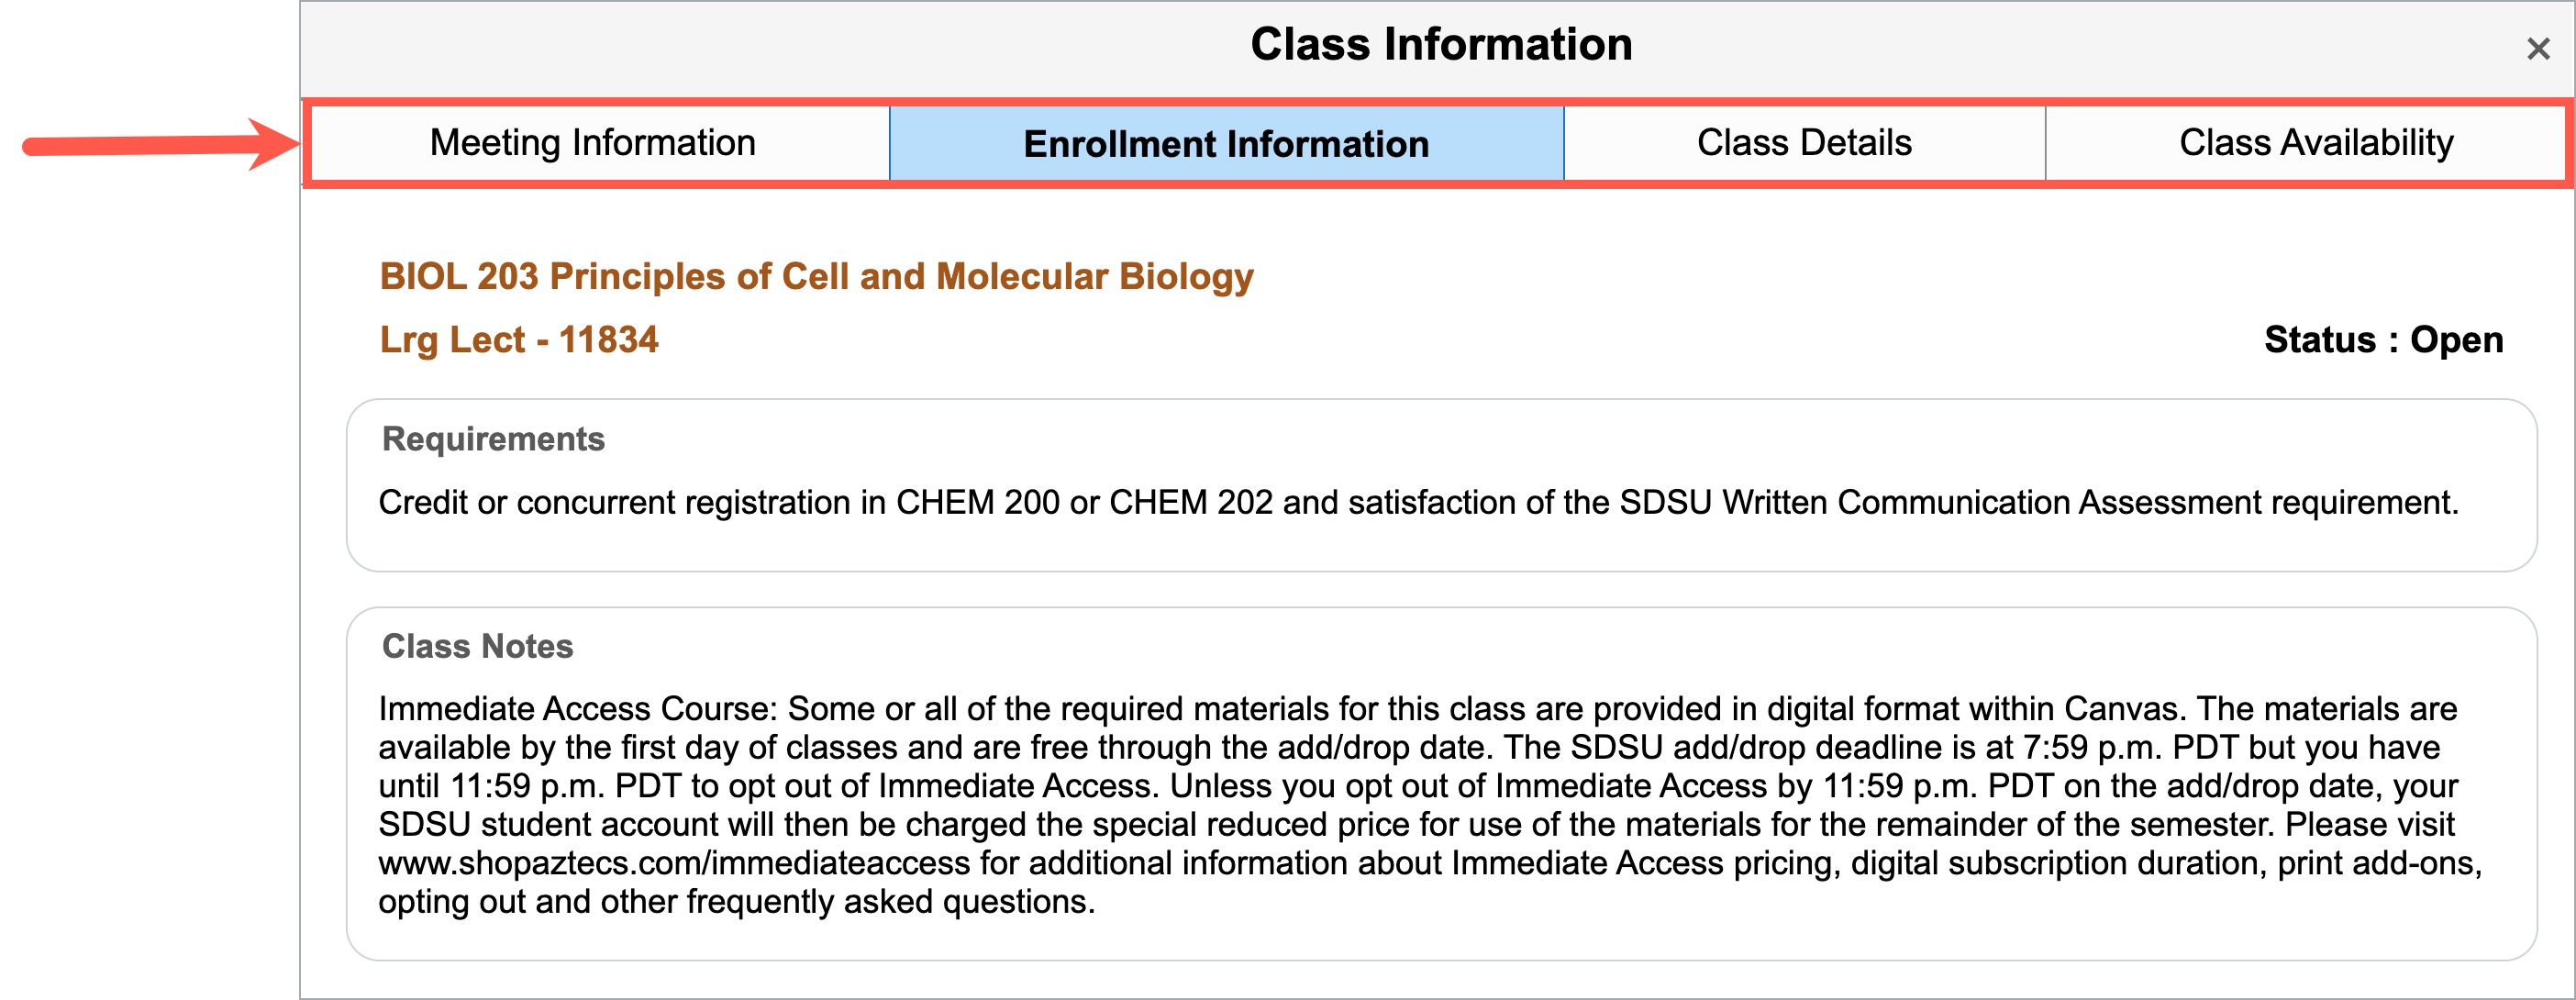
Once you find a section that you are interested in enrolling in, you must select the Class link to review important information about that section. Review the Enrollment Information listed carefully for course prerequisite and any additional information provided in the notes section to help determine whether you are eligible to enroll.
You may also re-review the meeting information, class details, and seat availability under this section.
1. Select the Manage Classes tile from the my.SDSU home page.
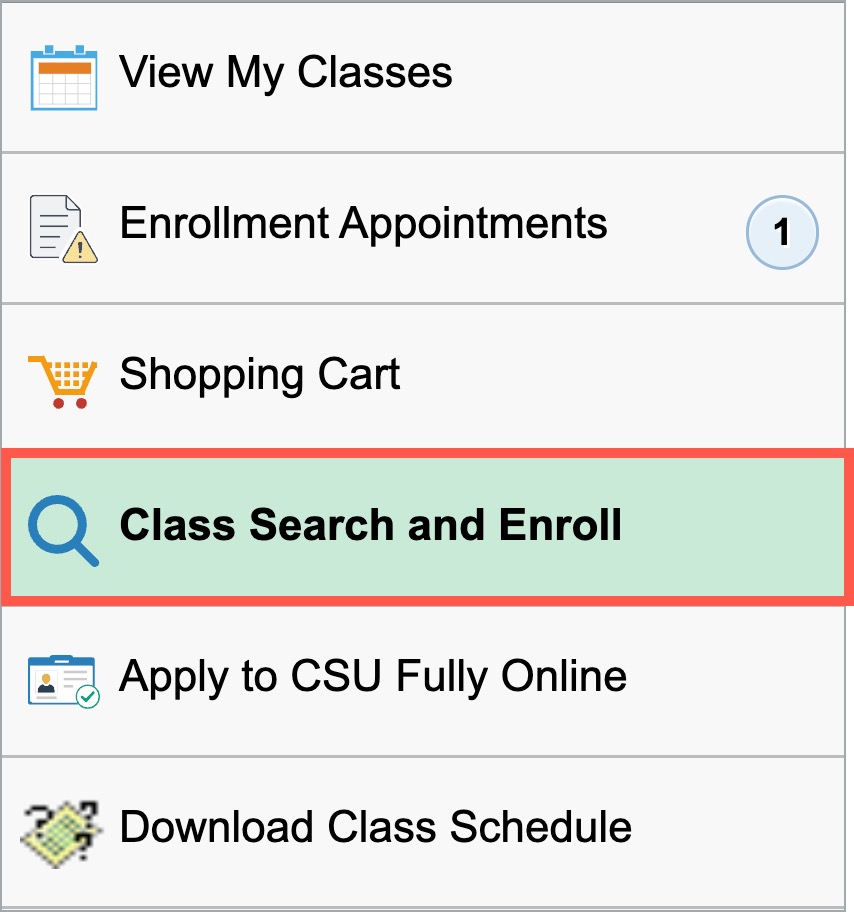
2. Select Class Search and Enroll from the menu.
3. Search for classes by first selecting the campus you are attending and then using a keyword or the Additional ways to search option.
4. View search results and apply filters as needed.
5. Select a course from the search results.
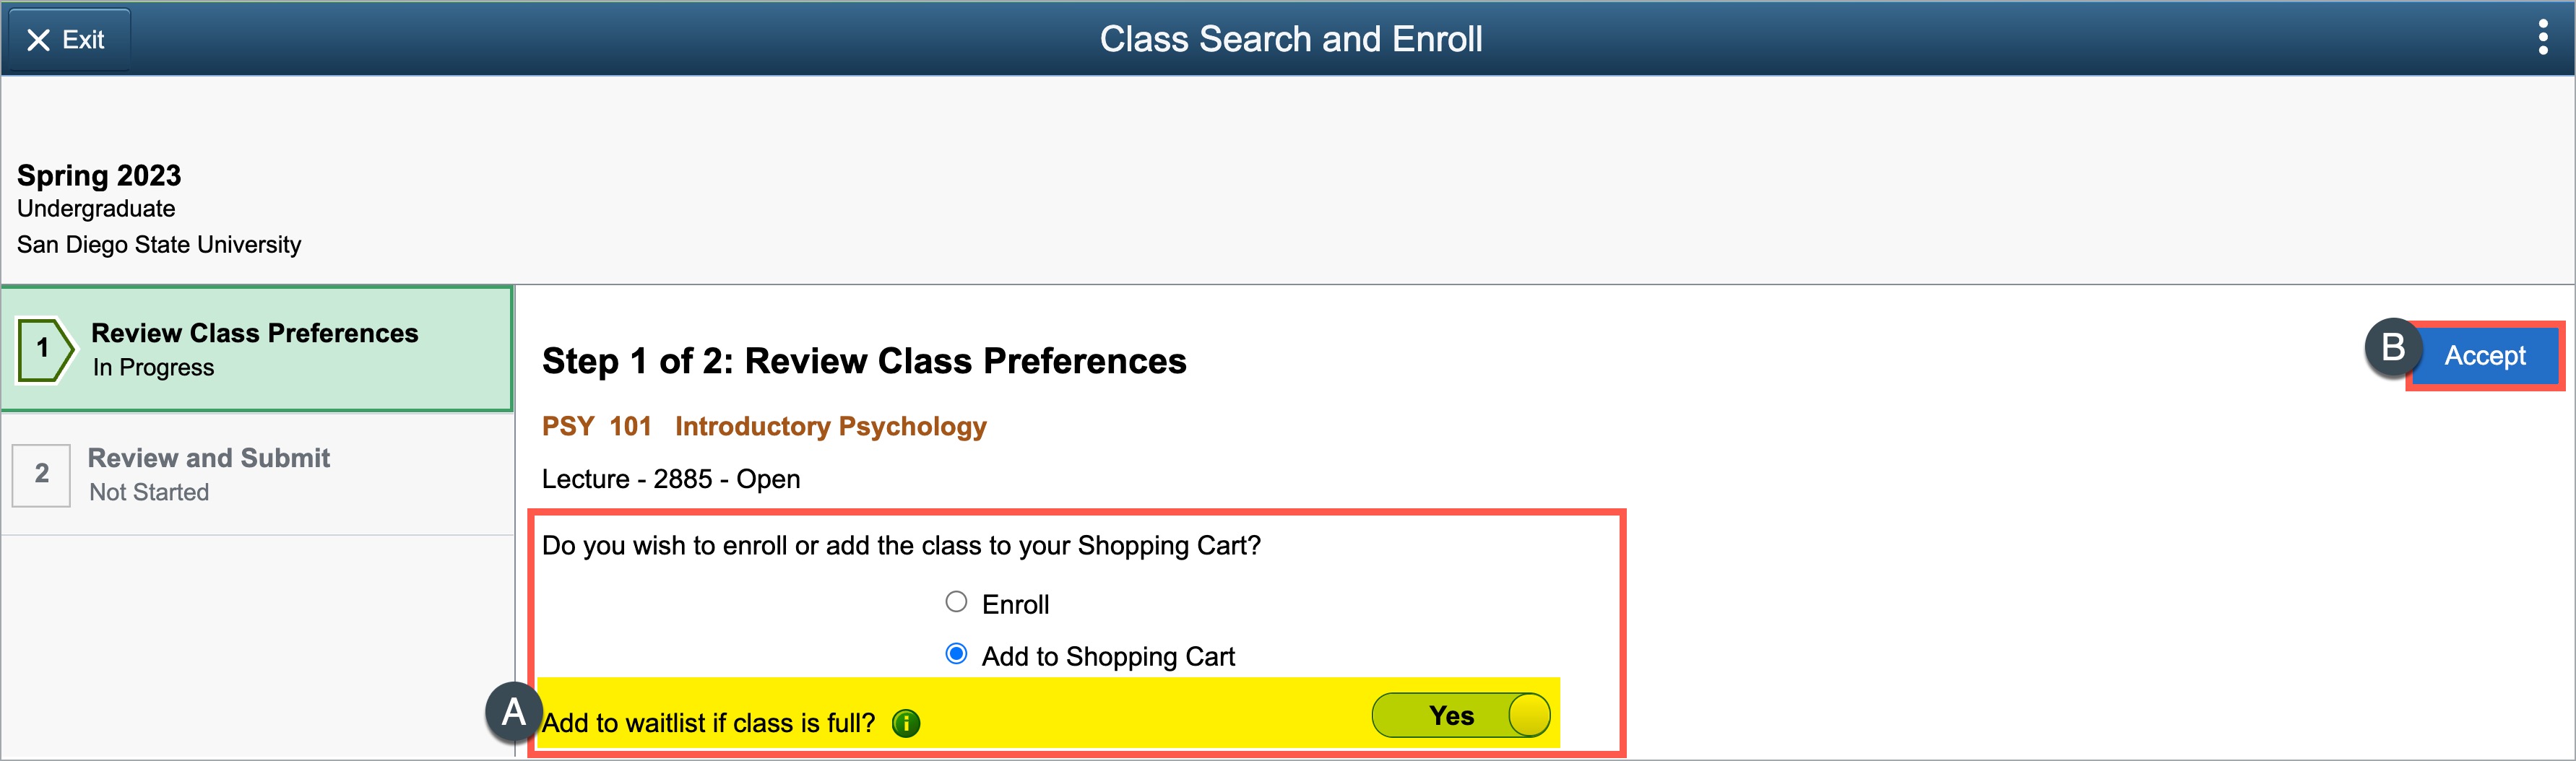
6. Select a course option.
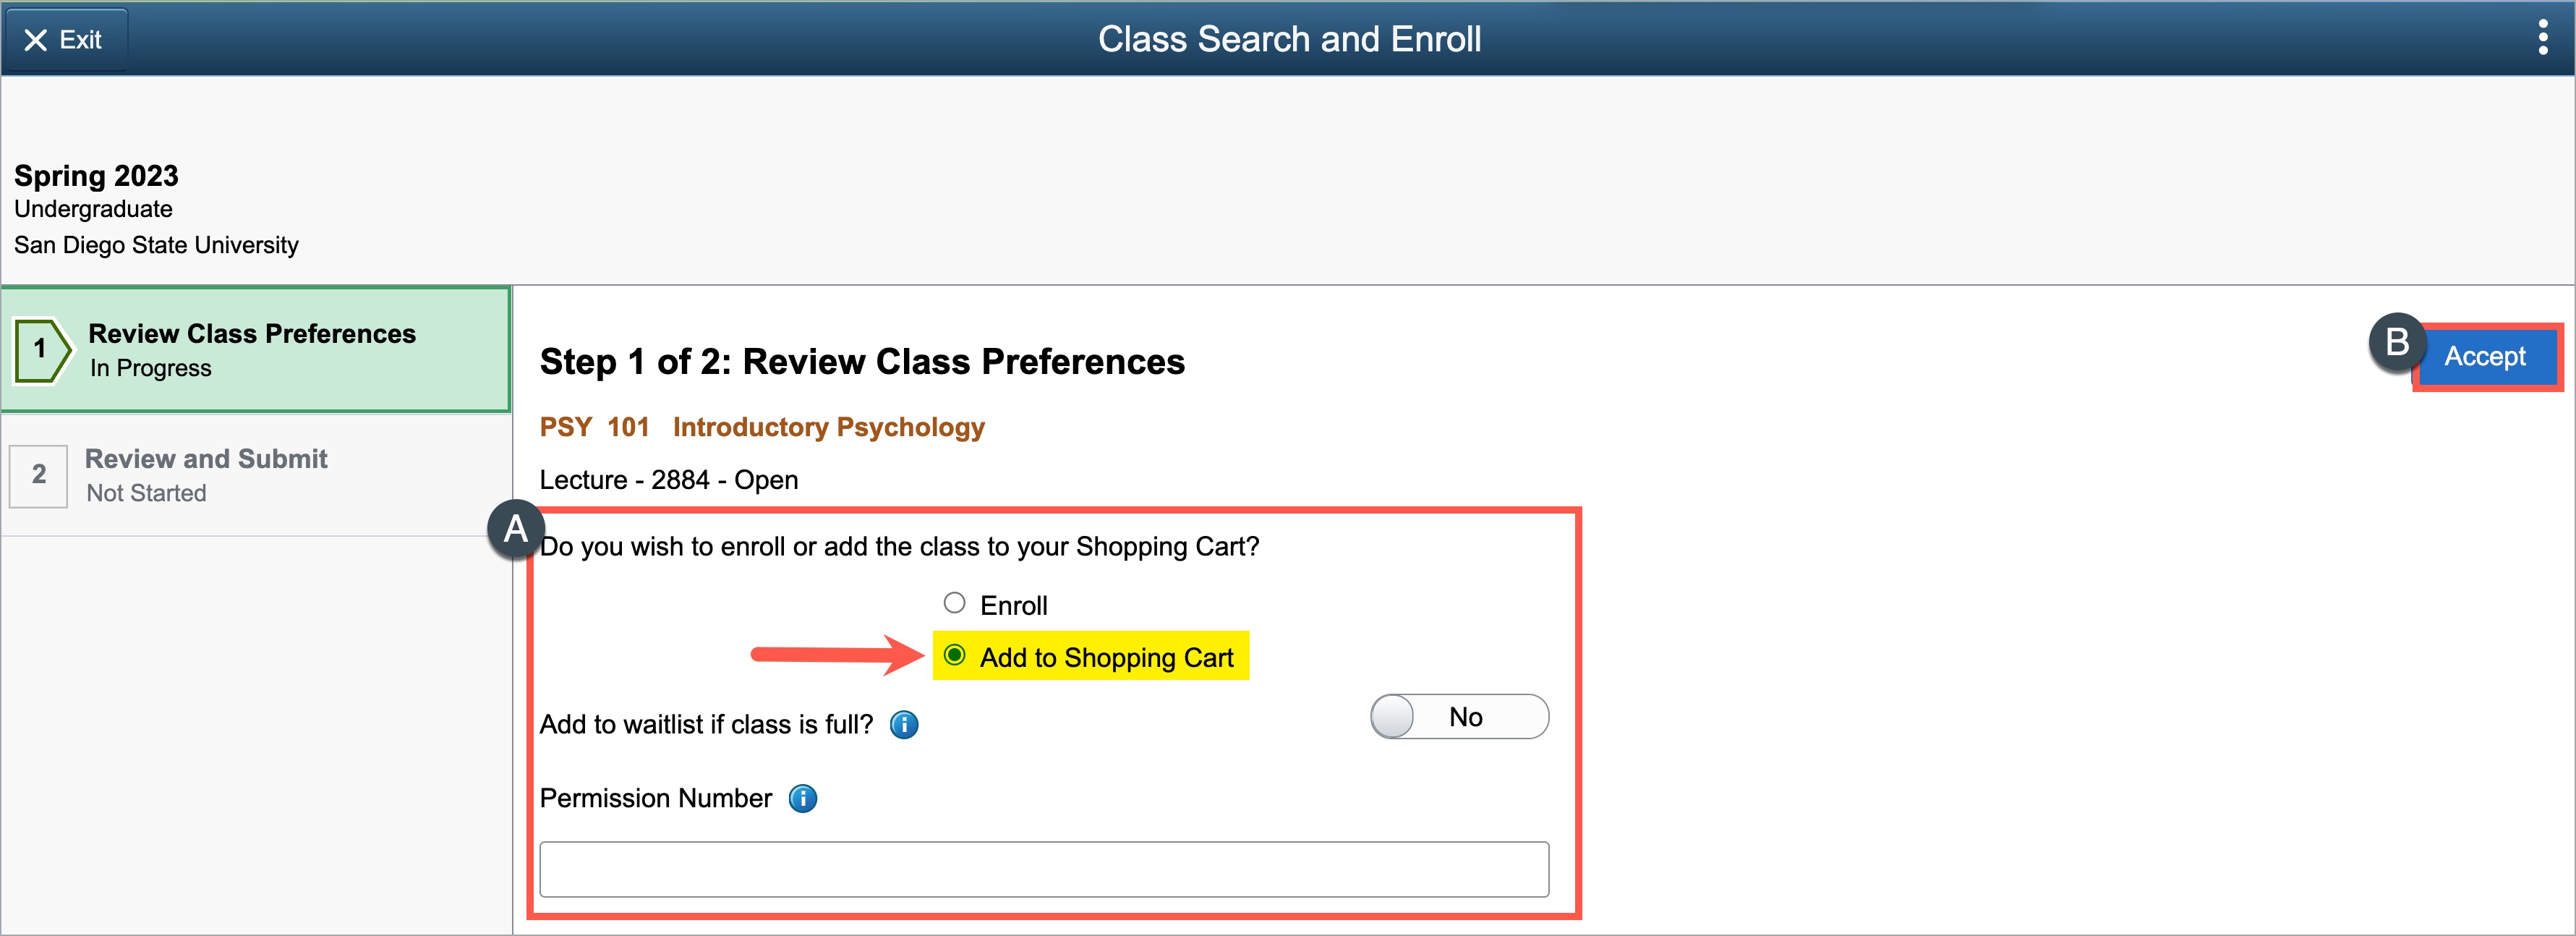
7. Choose your Waitlist preference (see letter A) and select Accept (see letter B).
- Before your enrollment date, the Enroll and Add to Shopping Cart selections will not show, and your class is automatically added to your shopping cart when you select Accept.
- After your enrollment date, select Enroll or Add to Shopping Cart.
If the course is full, use the section Add to waitlist if class is full? to automatically be added to the waitlist when enrolling (or enrolling from your Shopping Cart). Waitlists are now first come, first added so it is important to select this feature for courses that fill up quickly.
To be added to the waitlist, toggle Add to waitlist if class is full? to Yes (automatically defaults to "No").
Be sure Add to Shopping Cart is selected. Then select Accept to advance.
Note: Permission numbers will only be required to add courses after the waitlists have closed (after the 5th day of classes in fall and spring, review the Academic Calendar for summer session dates.)
8. Review and submit: Review choice, and select Submit to add the course to the Shopping Cart.
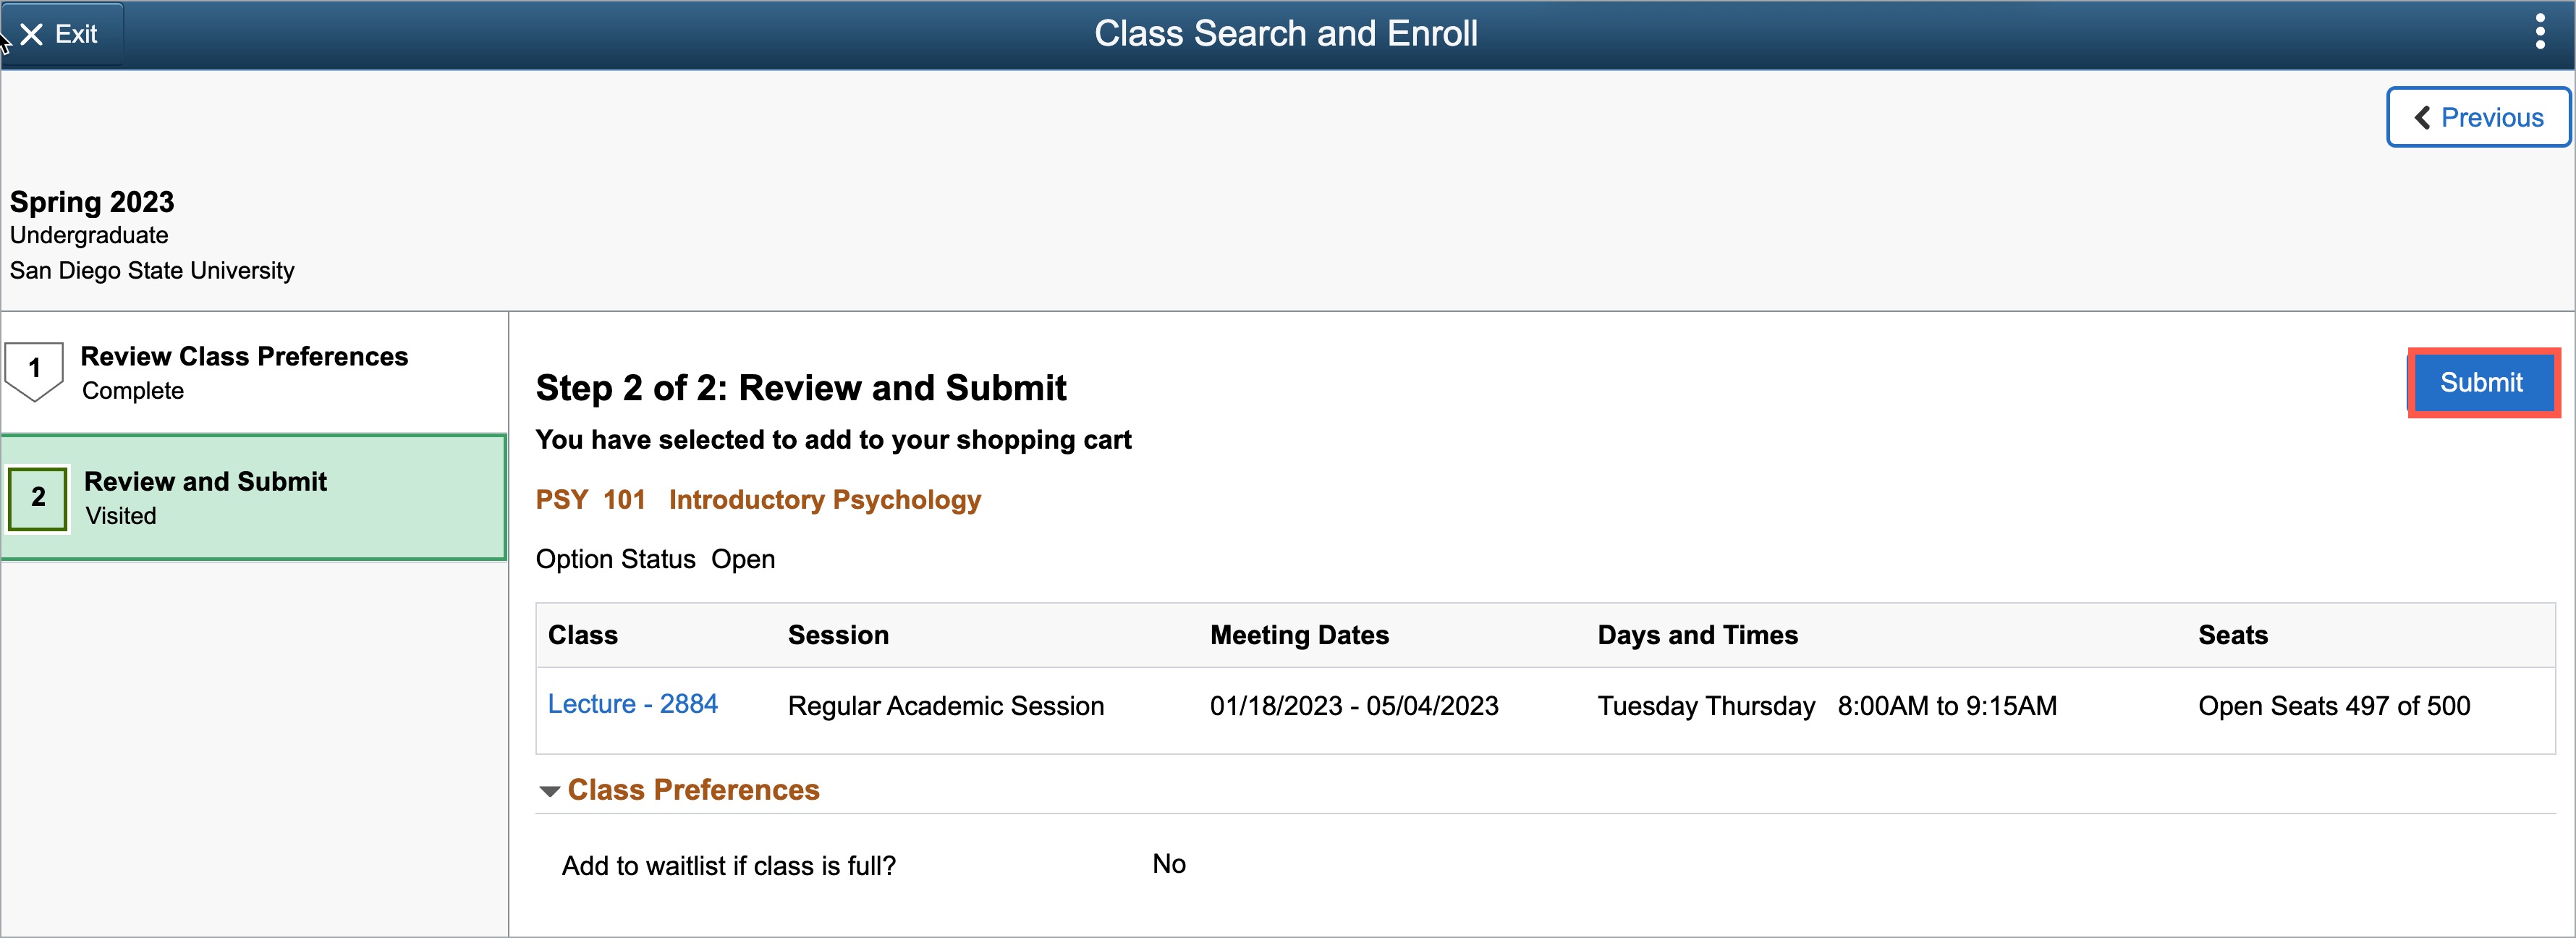
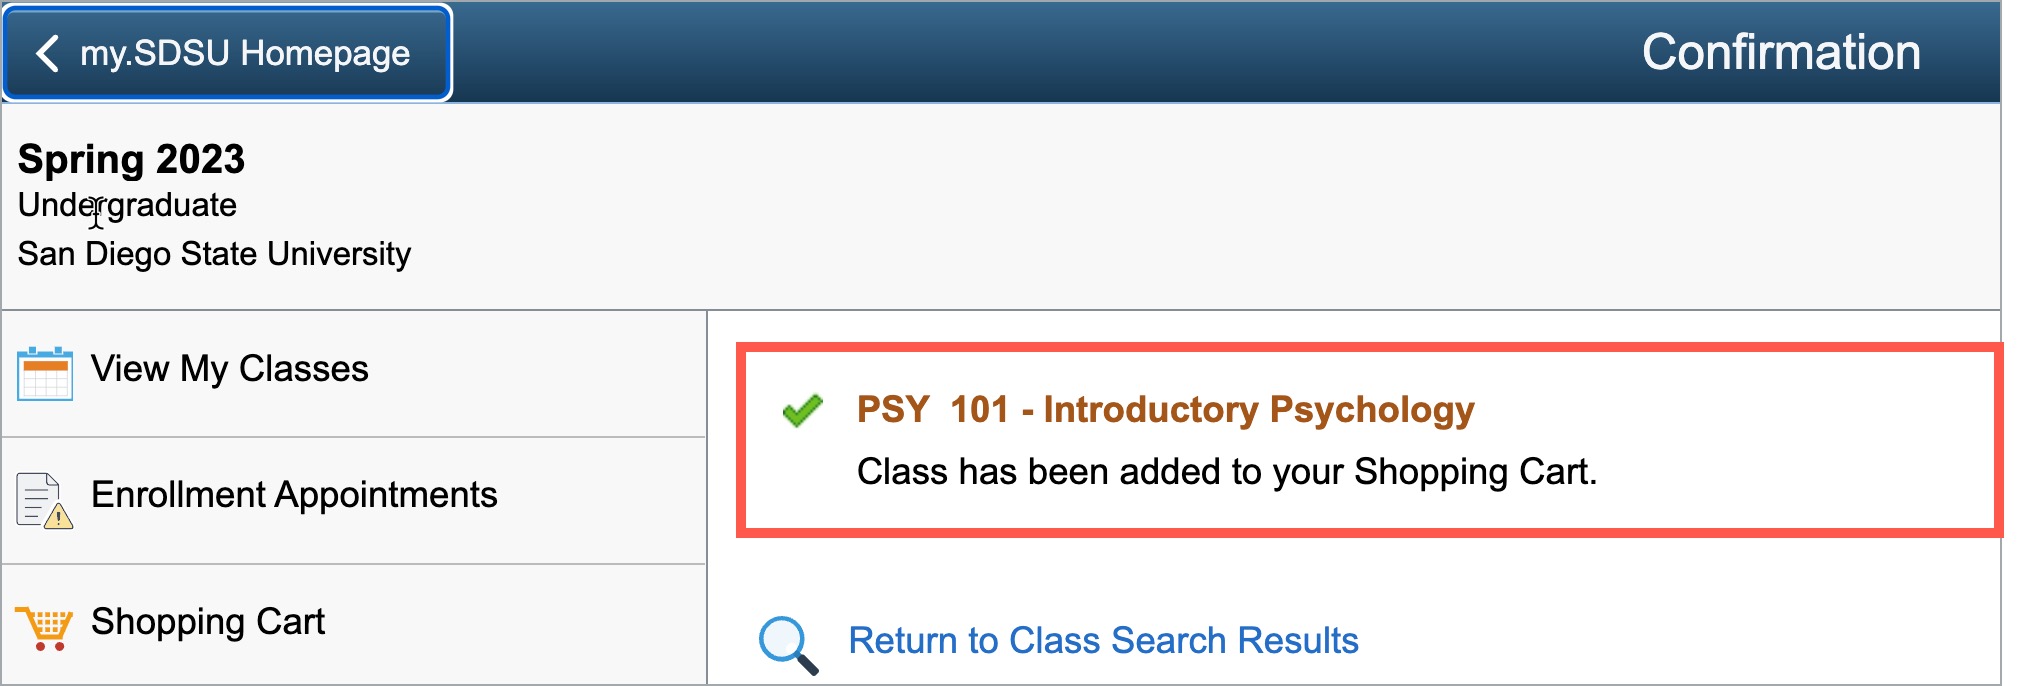
Once submitted, a notification will appear confirming that the course is added to the Shopping Cart.
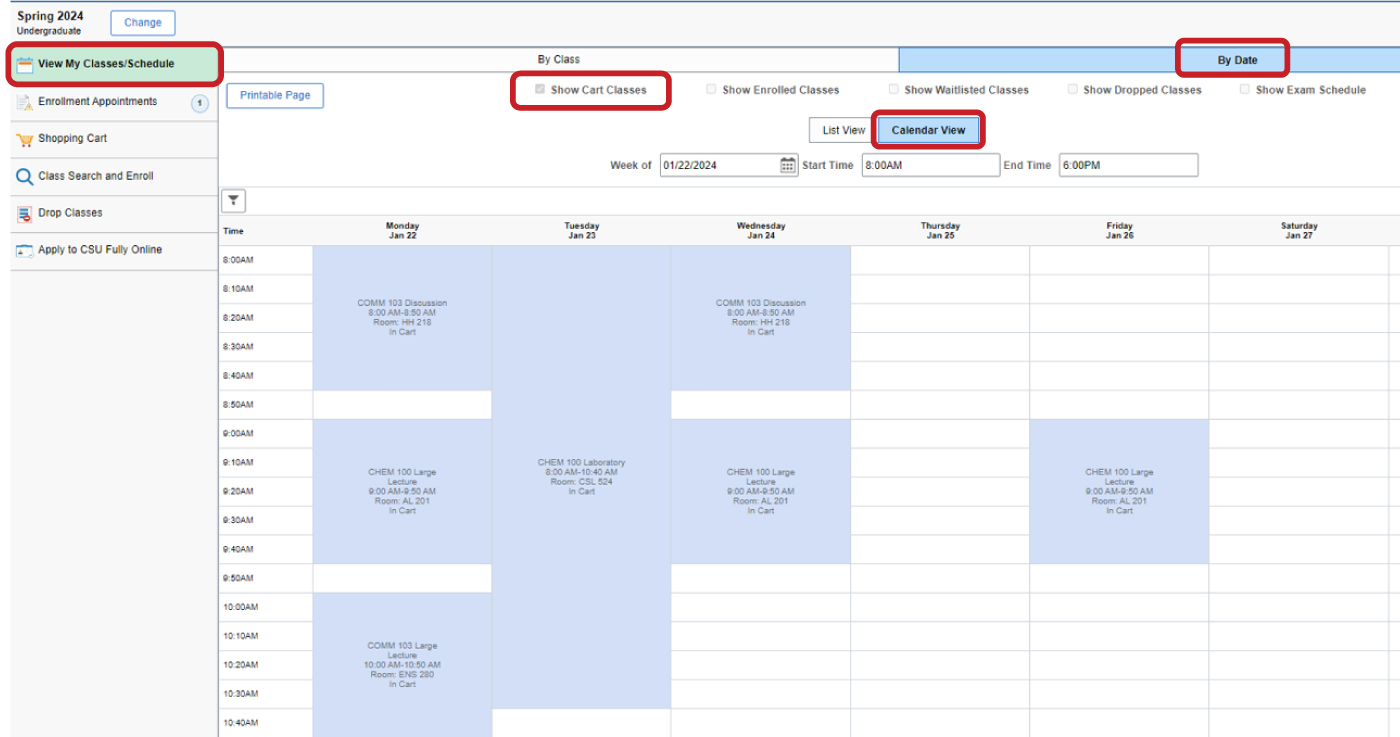
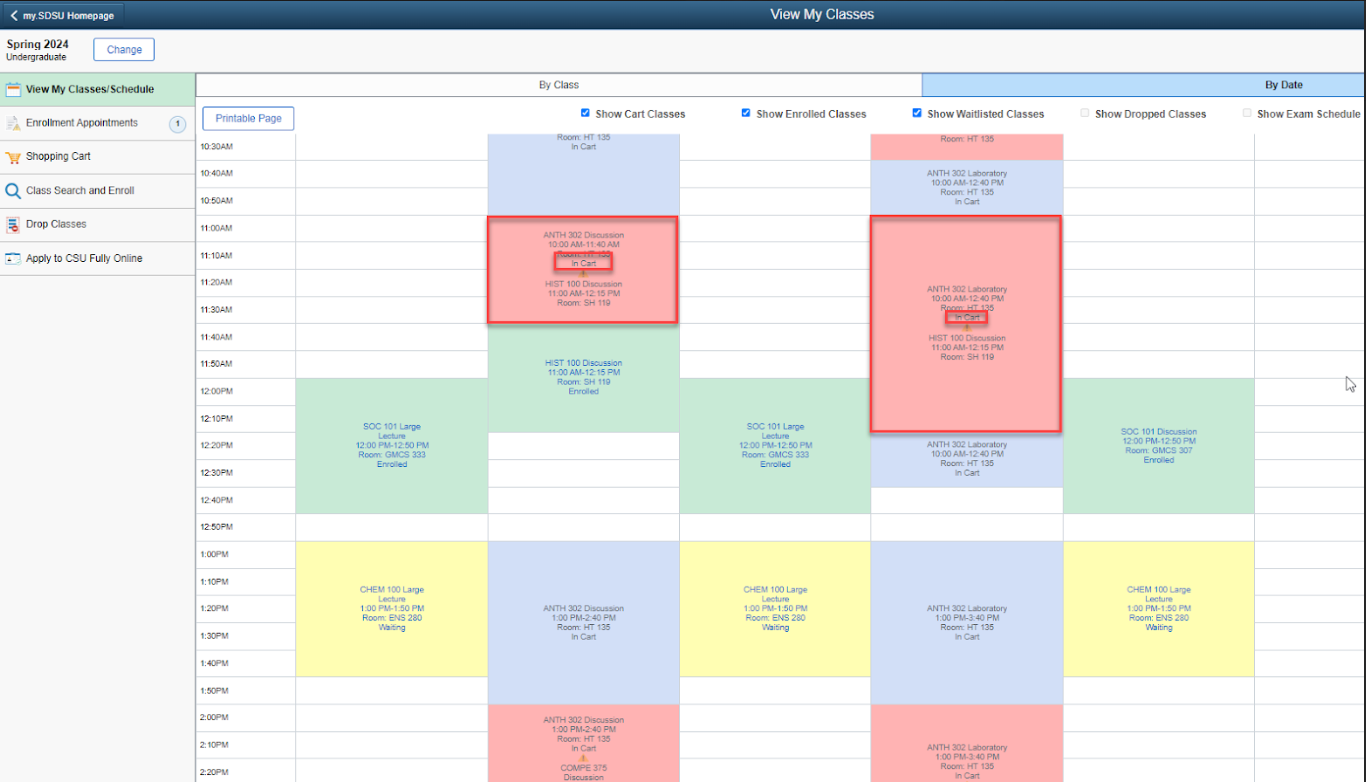
You may view your “In Cart” courses in the Shopping Cart menu or in the View My Classes/Schedule menu by selecting the “Show Cart Classes” button. This will provide you with the list of classes you have selected both by class and by date. You may also select either a list view or calendar view of your courses by selecting the By Date tab, then selecting either the List View or Calendar View.
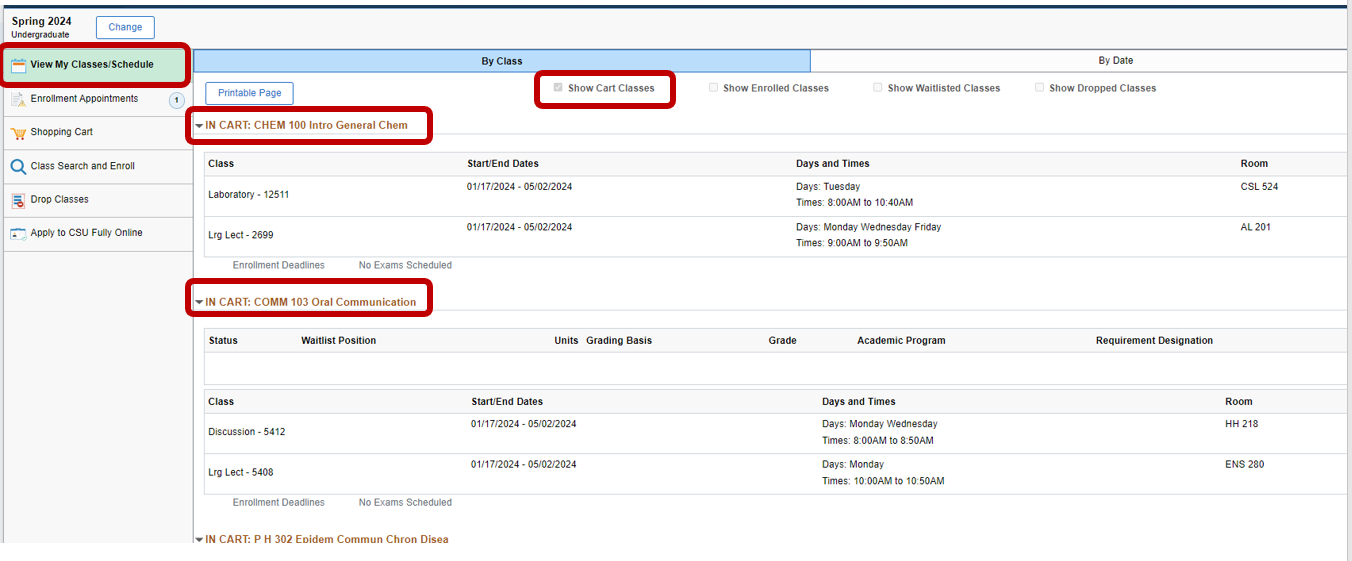
For Calendar View, select the By Date tab and then Calendar View.
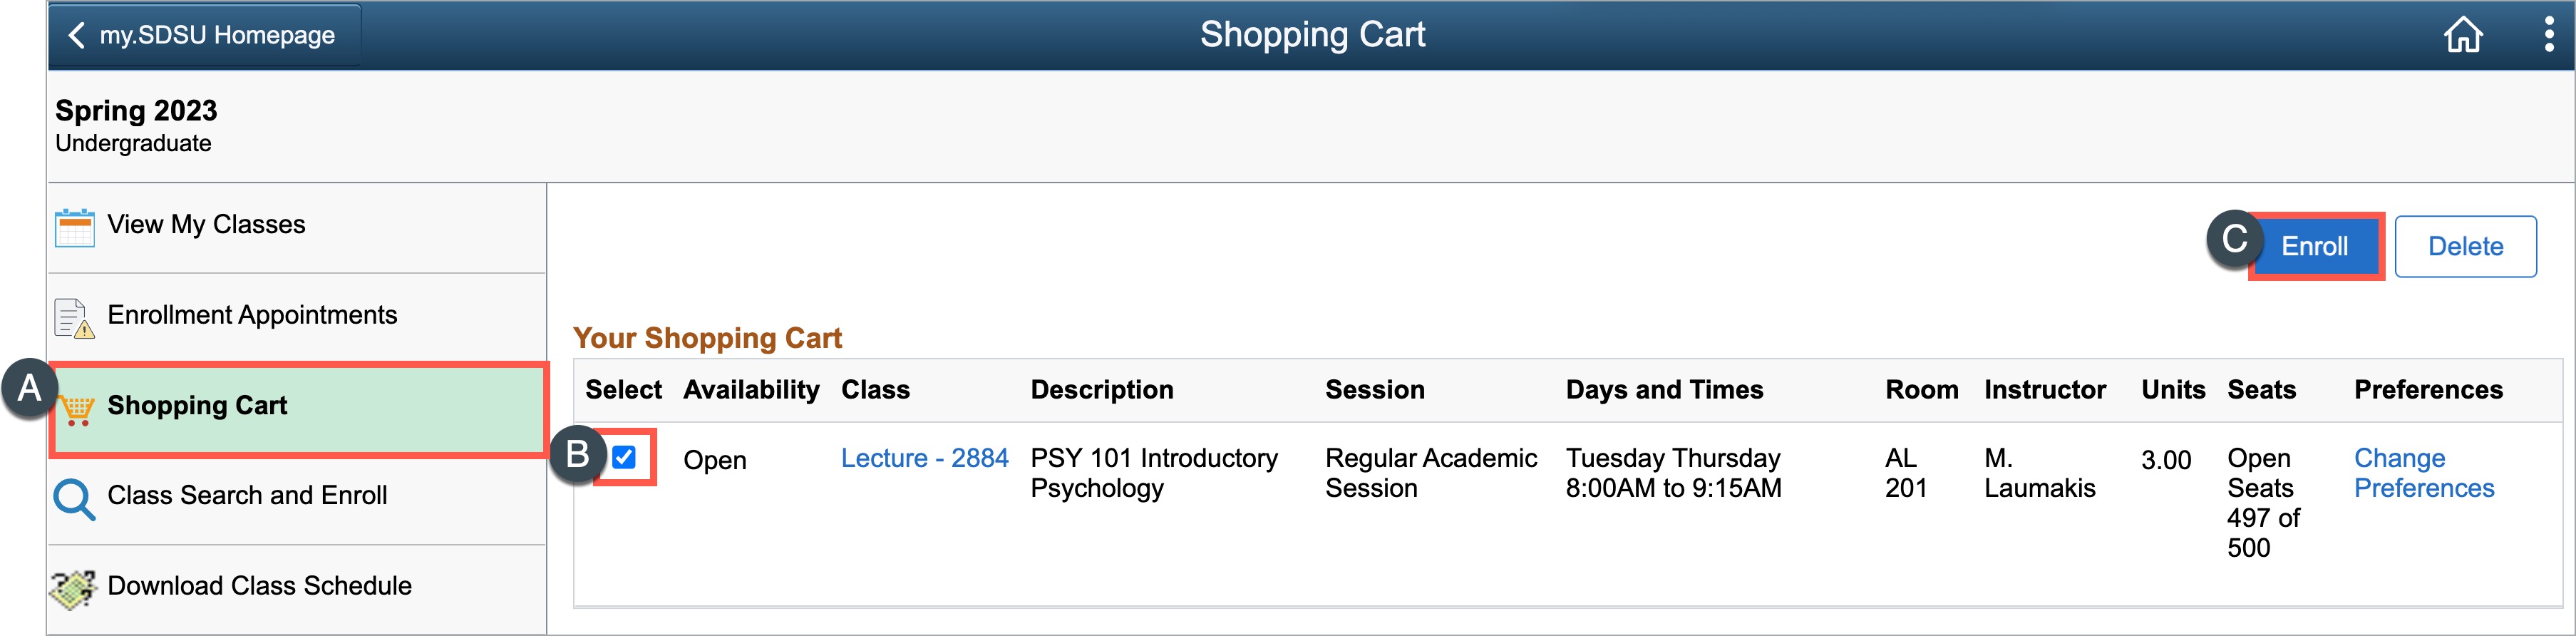
9. To complete an enrollment, navigate to the Shopping Cart (see letter A). Then, check the box next to one or more courses (see letter B). Select Enroll (see letter C) to enroll in the course.
Note: When enrolling in a course with a corequisite, both courses must be in the shopping cart and selected for enrollment at the same time.
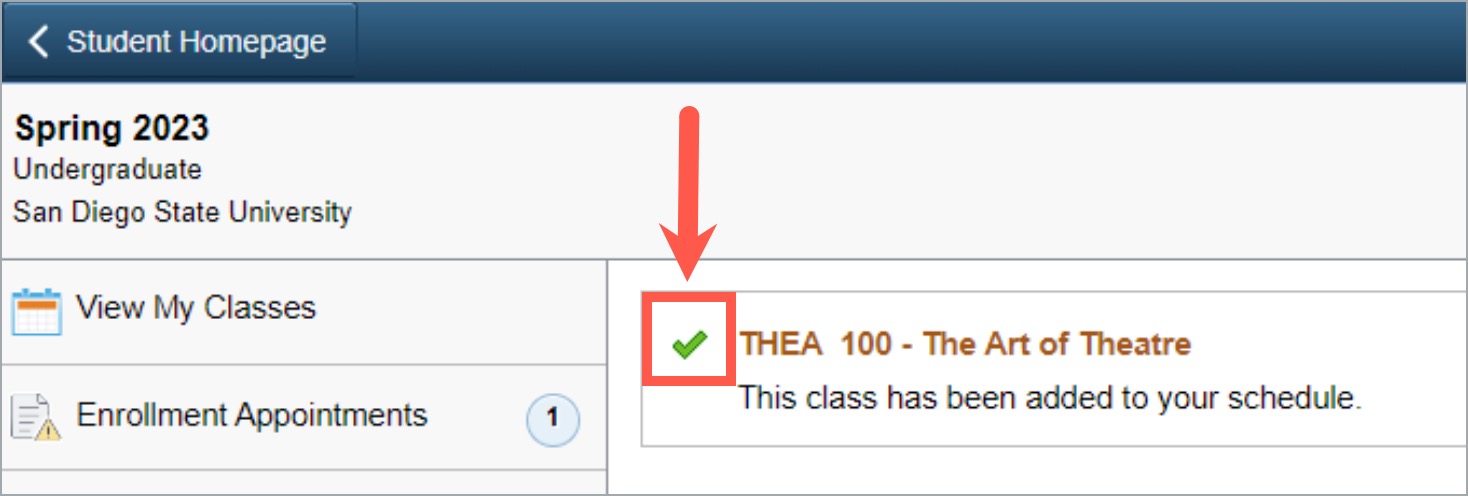
10. Pay close attention to any messages returned after selecting enroll.
A green checkmark will indicate a successful enrollment transaction.
A red “X” will indicate an unsuccessful enrollment transaction. Review the message carefully for more information.

11. Select the View My Classes link (see number 1) on the left side and select Show Enrolled Classes (see number 2) to verify your enrollment.
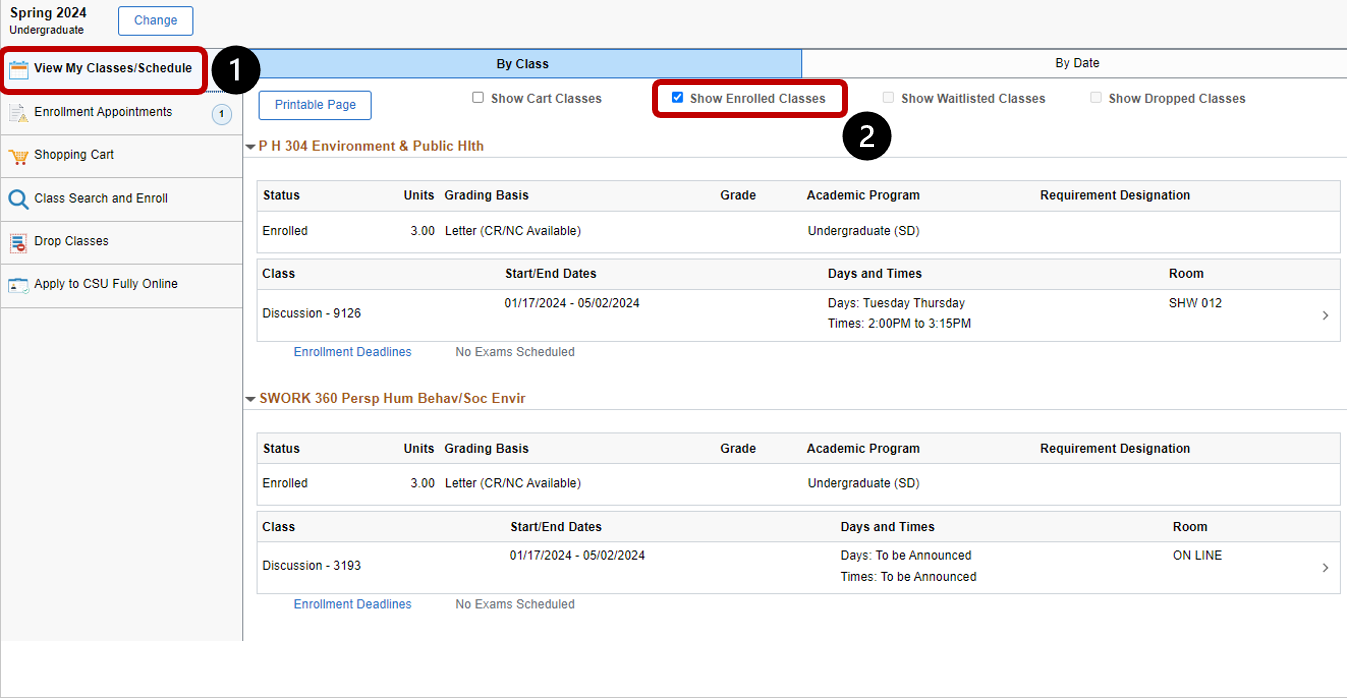
Reminder: In the View My Classes/Schedule menu, you are able to select to view In Cart classes, Enrolled classes, Waitlisted classes, and Dropped classes. The only courses that you are officially enrolled in are the Enrolled classes.
Calendar View Colors:
- Green: Enrolled in course
- Yellow: On waitlist - not enrolled in course
- Blue: In cart - not enrolled in course
- Red: Time conflict - courses have overlapping times; not enrolled in course
Please allow 1-2 business days following your class registration to see your charges for the term.
For a complete guide to paying your tuition and fees, please read How Do I Pay Basic Tuition And Fees?.